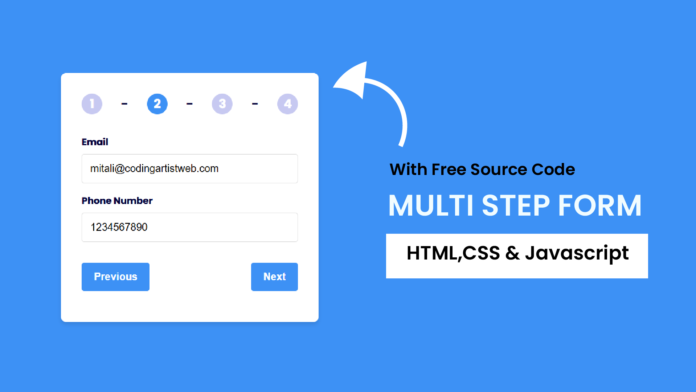
Forms are one of the most crucial components of any website or application, allowing users to input and submit data. A multi-step form is a great way to make lengthy forms user-friendly by breaking them into smaller, more manageable steps.
In this blog, we’ll create a fully functional multi-step form with step indicators and validation. Hence this form includes seamless transitions between steps, dynamic button controls, and validation for fields like email, password, and phone number.
Youtube Video:
Watch our youtube video to get a deeper knowledge on how this code works.
What You Will Learn
By the end of this tutorial, you’ll learn how to:
- Structure a multi-step form using HTML.
- Style it with CSS to make it responsive and visually appealing.
- Add interactivity and validation with JavaScript.
HTML: Structuring the Multi-Step Form
The form is divided into multiple steps, each contained within its own section (form-container).Since users can navigate between steps using Previous, Next, and Submit buttons. A stepper at the top highlights the current step. Learn how to create a transparent form here.
Here’s the HTML structure:
<!DOCTYPE html>
<html lang="en">
  <head>
    <meta charset="UTF-8" />
    <meta name="viewport" content="width=device-width, initial-scale=1.0" />
    <title>Multi-Step Form</title>
    <!-- Google Fonts -->
    <link
      href="https://fonts.googleapis.com/css2?family=Poppins&display=swap"
      rel="stylesheet"
    />
    <!-- Stylesheet -->
    <link rel="stylesheet" href="style.css" />
  </head>
  <body>
    <div class="container">
      <!-- Stepper -->
      <div id="stepperValue">
        <span class="steps">1</span>
        <span>-</span>
        <span class="steps">2</span>
        <span>-</span>
        <span class="steps">3</span>
        <span>-</span>
        <span class="steps">4</span>
      </div>

      <!-- Form Container -->
      <div id="multistep-form-container">
        <div class="form-container">
          <label for="first-name">First Name</label>
          <input
            type="text"
            class="input"
            placeholder="Enter your first name"
            id="first-name"
          />
          <label for="last-name">Last Name</label>
          <input
            type="text"
            class="input"
            placeholder="Enter your last name"
            id="last-name"
          />
        </div>
        <div class="form-container hide">
          <label for="email-input">Email</label>
          <input
            type="email"
            class="input"
            placeholder="Enter your email"
            id="email-input"
          />
          <label for="phone-input">Phone Number</label>
          <input
            type="number"
            class="input"
            placeholder="Enter your phone number"
            id="phone-input"
          />
        </div>
        <div class="form-container hide">
          <label for="password-input">Password</label>
          <input
            type="password"
            class="input"
            placeholder="Enter your password"
            id="password-input"
          />
          <label for="dob-input">Date of Birth</label>
          <input type="date" class="input" id="dob-input" />
        </div>
        <div class="form-container hide">
          <label for="address-input">Address</label>
          <input
            type="text"
            class="input"
            placeholder="Enter your address"
            id="address-input"
          />
          <label for="pin-code">Pin Code</label>
          <input
            type="number"
            class="input"
            placeholder="Enter your Pincode"
            id="pin-code"
          />
        </div>

        <!-- Buttons -->
        <div class="btns">
          <button class="btn hide" id="previous">Previous</button>
          <button class="btn" id="next">Next</button>
          <button class="btn hide" id="submit">Submit</button>
        </div>
      </div>
      <p id="error-message"></p>
    </div>
    <script src="script.js"></script>
  </body>
</html>
CSS: Styling the Multi-Step Form
The CSS styles ensure the form is visually appealing and responsive. The steps class highlights the current step, and the form transitions smoothly between steps.
* {
  margin: 0;
  padding: 0;
  box-sizing: border-box;
}
body {
  font-family: "Poppins", sans-serif;
  background-color: #3d91f5;
  color: #020138;
  display: flex;
  justify-content: center;
  align-items: center;
  min-height: 100vh;
}
.hide {
  display: none;
}
.container {
  background-color: #ffffff;
  padding: 2rem;
  border-radius: 8px;
  box-shadow: 0 4px 6px rgba(0, 0, 0, 0.1);
  max-width: 400px;
  width: 100%;
}
#stepperValue {
  display: flex;
  justify-content: space-between;
  align-items: center;
  margin-bottom: 2rem;
  font-weight: bold;
  text-align: center;
  font-size: 1.2rem;
}
.steps {
  display: inline-block;
  width: 32px;
  height: 32px;
  line-height: 32px;
  border-radius: 50%;
  background-color: #c7c9f1;
  color: #ffffff;
  text-align: center;
  transition: 0.3s ease;
}
.steps.highlight {
  background: #3d91f5;
  color: #ffffff;
  font-weight: bold;
}
.form-container {
  display: none;
}
.form-container:not(.hide) {
  display: block;
}
label {
  display: block;
  margin-bottom: 0.5rem;
  font-weight: bold;
  font-size: 0.9rem;
}
input {
  width: 100%;
  padding: 0.8rem;
  border: 1px solid #dddddd;
  border-radius: 4px;
  margin-bottom: 1rem;
  font-size: 1rem;
  transition: 0.3s;
}
input:focus {
  border-color: #3d91f5;
  outline: none;
  box-shadow: 0 0 4px rgba(76, 0, 255, 0.5);
}
.btns {
  display: flex;
  justify-content: space-between;
  margin-top: 1rem;
}
.btn {
  padding: 0.8rem 1.2rem;
  border: none;
  background: #3d91f5;
  color: #ffffff;
  border-radius: 4px;
  cursor: pointer;
  font-size: 1rem;
  font-weight: bold;
  transition: 0.3 ease;
}
.btn:hover {
  background: #3d91f5;
}
.btn:disabled {
  background: #dddddd;
  cursor: not-allowed;
}
.btn.hide {
  display: none;
}
#error-message {
  color: #e92828;
  font-size: 0.9rem;
  margin-top: 1rem;
  text-align: center;
}
Therefore JavaScript controls the step transitions and validates inputs like email, password, and phone number.
Key features include:
- Step Navigation: Buttons dynamically display the correct steps based on the user’s progress.
- Validation: Alerts the user if fields are incomplete or invalid.
- Highlighting Steps: Highlights the active step.
const formContainer = document.getElementsByClassName("form-container");
const previousBtn = document.getElementById("previous");
const nextBtn = document.getElementById("next");
const submitBtn = document.getElementById("submit");
const steps = document.getElementsByClassName("steps");
const error = document.getElementById("error-message");

let currentStep = 0;

window.onload = () => {
  currentStep = 0;
  steps[currentStep].classList.add("highlight");
  updateStepVisibility(currentStep);
};

const toggleButtonVisibility = () => {
  previousBtn.classList.toggle("hide", currentStep === 0);
  nextBtn.classList.toggle("hide", currentStep === formContainer.length - 1);
  submitBtn.classList.toggle("hide", currentStep !== formContainer.length - 1);
};

const updateStepVisibility = (stepIndex) => {
  for (let i = 0; i < formContainer.length; i++) {
    formContainer[i].classList.toggle("hide", i !== stepIndex);
  }
  toggleButtonVisibility();
};

nextBtn.addEventListener("click", () => {
  if (currentStep < formContainer.length - 1) currentStep++;
  updateStepVisibility(currentStep);
});

previousBtn.addEventListener("click", () => {
  if (currentStep > 0) currentStep--;
  updateStepVisibility(currentStep);
});
Conclusion
This form is an excellent way to improve user experience by splitting complex forms into smaller steps. With step indicators, button controls, and field validation, it ensures users can easily navigate and complete the form.
Try customizing the fields or adding additional steps to suit your project needs!


