Introduction:
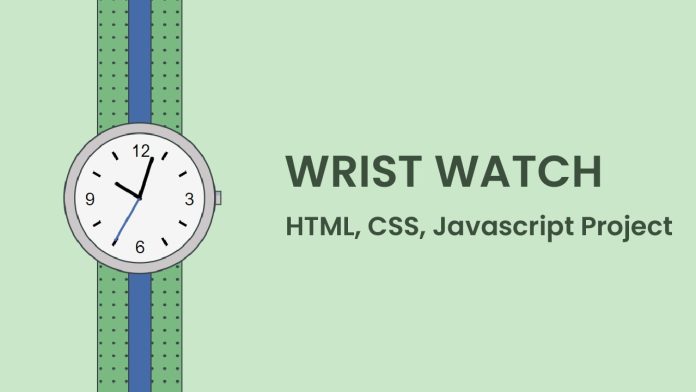
In this tutorial, we will learn how to create a Wrist watch using HTML, CSS, and JavaScript. The clock will show the current time and update in real time. By the end of this tutorial, you will have a better understanding of working with the DOM, handling time using JavaScript’s Date object, and using CSS transforms to animate elements. The project is beginner-friendly and is a great way to enhance your front-end development skills.
Things You Will Learn:
- How to structure a simple project folder.
- HTML and CSS basics for creating a clock layout.
- JavaScript’s Date object and its methods.
- Updating the clock in real-time using setInterval().
- Using CSS transforms to animate clock hands.
Video Tutorial:
For a more interactive experience, check out the video tutorial on my YouTube channel:
Project Folder Structure:
Create a new project folder and set up the following structure:
- index.html
- style.css
- script.js
- watch-background.svg
HTML:
Let’s start by creating the HTML file (index.html):
<!DOCTYPE html>
<html lang="en">
  <head>
    <meta name="viewport" content="width=device-width, initial-scale=1.0" />
    <title>Wrist watch</title>
    <!-- Stylesheet -->
    <link rel="stylesheet" href="style.css" />
  </head>
  <body>
    <div class="strap">
      <div class="pin"></div>
      <div class="watch">
        <img src="watch background.svg" />
        <div class="hour hand" id="hour"></div>
        <div class="minute hand" id="minute"></div>
        <div class="seconds hand" id="seconds"></div>
      </div>
    </div>
    <!-- Script -->
    <script src="script.js"></script>
  </body>
</html>
CSS:
Now, let’s create the CSS file (style.css) to style our clock:
* {
  padding: 0;
  margin: 0;
  box-sizing: border-box;
}
body {
  background-color: #cae8c9;
}
.strap {
  height: 100vh;
  width: 7.5em;
  border: 0.12em solid #3b4547;
  position: absolute;
  transform: translateX(-50%);
  left: 50%;
  background: radial-gradient(#3b4547 2px, #7ab982 2px);
  background-size: 1.12em 1.12em;
  background-position: -0.31em;
  border-top: none;
  border-bottom: none;
}
.strap:before {
  position: absolute;
  content: "";
  height: 100vh;
  width: 1.87em;
  background-color: #456ba8;
  border: 0.12em solid #3b4547;
  position: absolute;
  transform: translateX(-50%);
  left: 50%;
  border-top: none;
  border-bottom: none;
}
.watch {
  height: 11.25em;
  width: 11.25em;
  background-color: #f5f5f5;
  position: absolute;
  transform: translate(-50%, -50%);
  left: 50%;
  top: 50%;
  border-radius: 50%;
  box-shadow: 0 0 0 0.12em #3b4547, 0 0 0 0.93em #ccc8c9, 0 0 0 1.06em #3b4547;
}
.pin {
  position: absolute;
  height: 1.25em;
  width: 1.25em;
  background: linear-gradient(#aab1bc 0.31em, #ccc8c9 0.31em);
  border: 0.12em solid #3b4547;
  transform: translate(-50%, -50%);
  top: 50%;
  left: calc(50% + 6.56em);
}
img {
  height: 11.25em;
}
.hand {
  position: absolute;
  margin: auto;
  left: 0;
  right: 0;
  background-color: #000000;
  border-radius: 0.31em;
  transform-origin: bottom;
}
.hour {
  height: 2.5em;
  width: 0.31em;
  top: 3.12em;
}
.minute {
  height: 3.75em;
  width: 0.31em;
  top: 1.87em;
}
.seconds {
  height: 4.37em;
  width: 0.18em;
  top: 1.25em;
  background-color: #456ba8;
}
JS:
Finally, let’s implement the JavaScript logic in the script.js file:
const hour = document.getElementById("hour");
const minute = document.getElementById("minute");
const seconds = document.getElementById("seconds");

const setClock = setInterval(function clock() {
  let dateNow = new Date();
  let hr = dateNow.getHours();
  let min = dateNow.getMinutes();
  let sec = dateNow.getSeconds();

  let calcHr = hr * 30 + min / 2;
  let calcMin = min * 6;
  let calcSec = sec * 6;

  hour.style.transform = `rotate(${calcHr}deg)`;
  minute.style.transform = `rotate(${calcMin}deg)`;
  seconds.style.transform = `rotate(${calcSec}deg)`;
}, 1000);
Conclusion:
Congratulations! You have successfully created a dynamic clock using HTML, CSS, and JavaScript. Throughout this tutorial, we learned how to structure a project, manipulate the DOM, work with JavaScript’s Date object, and utilize CSS transforms for animations. This project can be a great addition to your portfolio and can be customized further to suit your design preferences. Keep practicing and exploring new front-end techniques to enhance your skills further. Happy coding!


