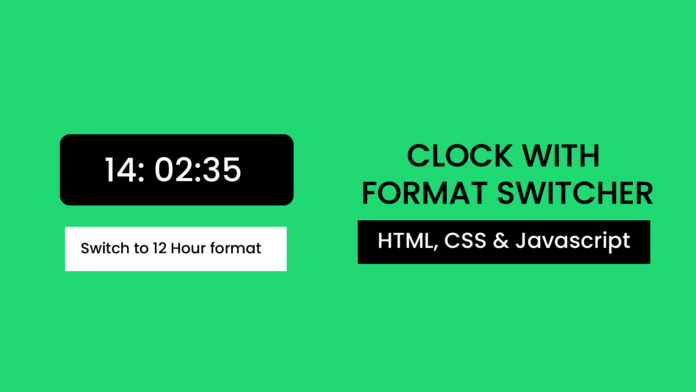
Have you ever wanted to create a dynamic digital clock that can toggle between 24-hour and 12-hour formats? Whether you’re designing a website or simply experimenting with JavaScript, this project is a fantastic way to enhance your skills. This tutorial will guide you through creating a functional digital clock using HTML, CSS, and JavaScript, complete with a format switcher to toggle between 12-hour and 24-hour displays.
By the end of this tutorial, you’ll not only have a fully functional digital clock but also a deeper understanding of JavaScript’s Date object, DOM manipulation, and event listeners.
What You Will Learn:
How to use the Date object to fetch and display the current time.
-DOM manipulation to dynamically update the time in real-time.
-Implementing a toggle feature to switch between 24-hour and 12-hour clock formats.
-Styling the digital clock using CSS for a clean and modern appearance.
Learn how to create analog clock here.
Youtube Video:
To help you follow along, I’ve created a step-by-step video tutorial explaining how to build this digital clock from scratch. In the video, I demonstrate:
- Writing the HTML, CSS, and JavaScript for the clock.
- How to dynamically update the time and switch formats.
- Testing the functionality in a browser.
You’ll find the complete source code in the description of the video, so you can download it and start experimenting immediately.
HTML
The HTML structure is minimal, featuring a clock display and a button to switch between formats.
<!DOCTYPE html>
<html lang="en">
  <head>
    <meta name="viewport" content="width=device-width, initial-scale=1.0" />
    <title>Digital Clock with 24-Hour Switcher</title>
    <!-- Google Fonts -->
    <link
      href="https://fonts.googleapis.com/css2?family=Roboto+Mono:wght@500&display=swap"
      rel="stylesheet"
    />
    <!-- Stylesheet-->
    <link rel="stylesheet" href="style.css" />
  </head>
  <body>
    <div class="clock" id="clock">00:00:00</div>
    <button class="switcher" id="switcher">Switch to 12-hour Format</button>
    <script src="script.js"></script>
  </body>
</html>
CSS
The CSS styles the clock and button, ensuring a clean and modern design that looks great on any screen.
body {
  font-family: "Roboto Mono", monospace;
  display: flex;
  flex-direction: column;
  justify-content: center;
  align-items: center;
  height: 100vh;
  margin: 0;
  background-color: #20d972;
  color: #ffffff;
}
.clock {
  font-size: 3rem;
  background-color: #0d0d0d;
  color: #ffffff;
  padding: 40px 60px;
  border-radius: 10px;
  box-shadow: 0 4px 8px rgba(0, 0, 0, 0.3);
  margin-bottom: 20px;
}
.switcher {
  font-size: 1rem;
  padding: 10px 20px;
  background-color: #ffffff;
  border: none;
  outline: none;
  border-radius: 5px;
  cursor: pointer;
  box-shadow: 0 2px 4px rgba(0, 0, 0, 0.3);
}
JavaScript
The JavaScript handles the logic for displaying the time and toggling between 24-hour and 12-hour formats.
let is24HourFormat = true; // Default to 24-hour format

function updateClock() {
  const clockElement = document.getElementById("clock");
  const now = new Date();

  let hours = now.getHours();
  const minutes = String(now.getMinutes()).padStart(2, "0");
  const seconds = String(now.getSeconds()).padStart(2, "0");
  let period = "";

  if (!is24HourFormat) {
    period = hours >= 12 ? " PM" : " AM";
    hours = hours % 12 || 12; // Convert to 12-hour format
  }

  hours = String(hours).padStart(2, "0");
  clockElement.textContent = `${hours}:${minutes}:${seconds}${period}`;
}

function toggleFormat() {
  const switcherButton = document.getElementById("switcher");
  is24HourFormat = !is24HourFormat;

  if (is24HourFormat) {
    switcherButton.textContent = "Switch to 12-Hour Format";
  } else {
    switcherButton.textContent = "Switch to 24-Hour Format";
  }

  updateClock(); // Update the clock immediately after switching
}

// Event listener for the switcher button
document.getElementById("switcher").addEventListener("click", toggleFormat);

// Update the clock every second
setInterval(updateClock, 1000);

// Initial call to display the clock immediately
updateClock();
How It Works
- Fetching the Time:
- The
Dateobject is used to retrieve the current time, including hours, minutes, and seconds. - The
padStartmethod ensures that single-digit values (e.g., 5 seconds) are displayed as two digits (e.g., 05).
- The
- Format Switching:
- A toggle button switches between 24-hour and 12-hour formats by modifying the
is24HourFormatflag. - The clock immediately updates to reflect the selected format.
- A toggle button switches between 24-hour and 12-hour formats by modifying the
- Real-Time Updates:
- The
setIntervalfunction updates the clock every second to ensure it displays the current time in real-time.
- The
Video Tutorial
To help you follow along, I’ve created a step-by-step video tutorial explaining how to build this digital clock from scratch. In the video, I demonstrate:
- Writing the HTML, CSS, and JavaScript for the clock.
- How to dynamically update the time and switch formats.
- Testing the functionality in a browser.
You’ll find the complete source code in the description of the video, so you can download it and start experimenting immediately.
Conclusion
Building a digital clock with a 24-hour/12-hour switcher is a great project for beginners and intermediate developers. It sharpens your JavaScript skills while teaching you about time manipulation and real-time updates.
Start building your own version today, and don’t forget to check out the accompanying video tutorial for detailed guidance!


