Video Tutorial:
If you prefer to code along to a video tutorial rather than reading the blog post check out this video down below. I post regular exciting tutorials on HTML, CSS and Javascript on my youtube channel. Do subscribe to my youtube channel to stay updated with the latest tutorials.
Project Folder Structure:
Now let us create the project folder structure first. The project folder is called ‘Waves Animation Header’. Inside this folder, we have 7 files in total. The first is the index.html file, the next one is style.css and the remaining are the SVG files.
These SVGs are wave images. You can download these images along with the source code from down below.
HTML:
First, let us start coding the HTML. Now copy the code below and paste it into your HTML document.
The HTML section consists of a header tag. inside the header element, we have 5 image files. Following these SVG images, we have an h1 element.
<!DOCTYPE html>
<html lang="en">
  <head>
    <meta name="viewport" content="width=device-width, initial-scale=1.0" />
    <title>Wave Animation Header</title>
    <!-- Google Font -->
    <link
      href="https://fonts.googleapis.com/css2?family=Poppins:wght@400;600&display=swap"
      rel="stylesheet"
    />
    <!-- Stylesheet -->
    <link rel="stylesheet" href="style.css" />
  </head>
  <body>
    <header>
      <img src="wave-1.svg" />
      <img src="wave-2.svg" />
      <img src="wave-3.svg" />
      <img src="wave-4.svg" />
      <img src="wave-5.svg" id="shape" />
      <h1>WAVES ANIMATION</h1>
    </header>
    <section>
      <p>
        Lorem ipsum dolor sit amet consectetur adipisicing elit. Non veniam
        commodi temporibus in laborum deleniti ullam facere accusamus labore
        distinctio explicabo debitis, est nihil id? Alias voluptatem quis
        eveniet magni. Tenetur iusto possimus neque animi cupiditate earum
        praesentium sunt voluptate recusandae? Dolorem nisi inventore laudantium
        qui labore amet, a ut iusto neque animi ipsa cum distinctio ex nemo sint
        ullam, saepe dignissimos nobis. Assumenda perspiciatis porro neque saepe
        quibusdam, aut cupiditate ad repellat at. Tempore eos quod incidunt amet
        natus sunt itaque impedit soluta quis commodi veritatis voluptates
        facilis doloremque dolor ipsum at aliquam ipsa quasi, nam nostrum
        deserunt earum nemo consectetur! Recusandae, sunt iure! Quasi odit
        dolorum necessitatibus. Nihil est veniam tempora! Praesentium voluptates
        voluptatem illo mollitia facere dolor. Quas atque aliquid voluptas quasi
        odio nostrum ad hic ipsa commodi provident numquam impedit, eos quidem
        natus dolor aspernatur incidunt, consequuntur rem consequatur
        repellendus molestiae earum quia totam suscipit? Impedit corrupti ab
        cumque molestiae blanditiis eius ea voluptates placeat rem illo! Esse
        obcaecati, sapiente, consequuntur et quia officia harum minima explicabo
        necessitatibus molestiae temporibus ipsa, possimus magni quibusdam
        repellat. Excepturi inventore nisi sapiente temporibus, voluptas sequi
        autem, voluptatibus suscipit id fuga magnam dolor! Quos porro dicta,
        recusandae magnam odio, cumque fuga eaque ipsa voluptatum quasi, placeat
        quas perspiciatis repellendus! Tempore, quia quisquam? Tempore aliquid
        in possimus sequi id sapiente laudantium perferendis, explicabo,
        delectus est blanditiis, officia animi porro eligendi recusandae dolore
        quos nihil nulla commodi praesentium officiis facilis. Recusandae optio
        omnis error! Voluptatum id quibusdam doloremque, nobis modi fugiat odio
        consectetur nostrum deserunt fugit sunt numquam nemo consequuntur autem
        non accusantium ipsam asperiores voluptate fuga, suscipit facere!
        Impedit earum similique cumque sed, facere alias quas iusto! Dignissimos
        impedit facere fuga necessitatibus quis nihil recusandae rem explicabo
        vero. A perspiciatis fuga voluptatum tempore sit nemo, ea, illo iste
        mollitia sapiente maiores.
      </p>
    </section>
  </body>
</html>
CSS:
Now let us style and add animation to these images using CSS. First copy the code provided below and paste it into your stylesheet.
We start by removing the margins and paddings from all the elements. Next, we set the height of the header to 100vh and the ‘background-color’ to #577eff.
We position the image with id ‘shape’ to the bottom by -2vw of the header.
For all the other images we set a random opacity and position them to the bottom of the header.
Other Tutorials You Might Like:
- Pop Out Corner Menu Using Javascript
- Simple Tooltips | HTML and CSS Tutorial
- Div Follows Mouse Cursor
We also assign them animations with random translateY values.
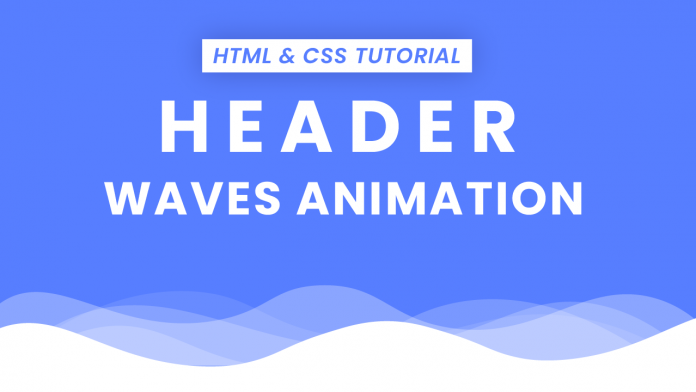
Now the most important step here would be to set the overflow of the header to hidden. The final look is a header with smooth waves animation.
* {
  padding: 0;
  margin: 0;
  box-sizing: border-box;
}
header {
  height: 100vh;
  background-color: #577eff;
  position: relative;
  overflow: hidden;
}
#shape {
  position: absolute;
  left: 0;
  bottom: -2vw;
}
img:not(#shape) {
  position: absolute;
  left: 0;
}
header img:nth-child(1) {
  opacity: 0.4;
  bottom: -0.1vw;
  animation: move-1 5s infinite;
}
@keyframes move-1 {
  50% {
    transform: translateY(15px);
  }
}
header img:nth-child(2) {
  opacity: 0.3;
  bottom: 0.5vw;
  animation: move-2 4s infinite;
}
@keyframes move-2 {
  50% {
    transform: translateY(35px);
  }
}
header img:nth-child(3) {
  bottom: 0.3vw;
  opacity: 0.2;
  animation: move-3 3.5s infinite;
}
@keyframes move-3 {
  50% {
    transform: translateY(25px);
  }
}
header img:nth-child(4) {
  bottom: 0.1vw;
  opacity: 0.3;
  animation: move-4 3s infinite;
}
@keyframes move-4 {
  50% {
    transform: translateY(20px);
  }
}
header h1 {
  width: 100%;
  font-family: "Poppins", sans-serif;
  position: absolute;
  transform: translate(-50%, -50%);
  left: 50%;
  top: 50%;
  font-size: 8vmin;
  text-align: center;
  color: #ffffff;
}
section p {
  font-family: "Poppins", sans-serif;
  padding: 30px 35px;
  margin-top: 50px;
  text-align: justify;
  line-height: 2em;
  letter-spacing: 0.5px;
}
That’s it for this tutorial. If you have any issues you can download the source code by clicking on the download button below. Also, I would love to hear from you guys. So if you have any queries, suggestions or feedback do comment on them below. I will be back again with an exciting tutorial soon.
Happy Coding!


