Video Tutorial:
If you like to learn along with a video tutorial rather than reading this blog post, you can check out this video tutorial here down below. I post new tutorials and tips on my youtube channel regularly. Subscribe to my youtube channel, so you don’t miss out on any of these resources.
Project Folder Structure:
Let us start by creating the project folder structure. For this, we create a folder with the name – ‘Difference between two dates’. Within this folder, we have three files. These three files are index.html, style.css and script.js. They are the HTML document, the stylesheet and the script file.
HTML:
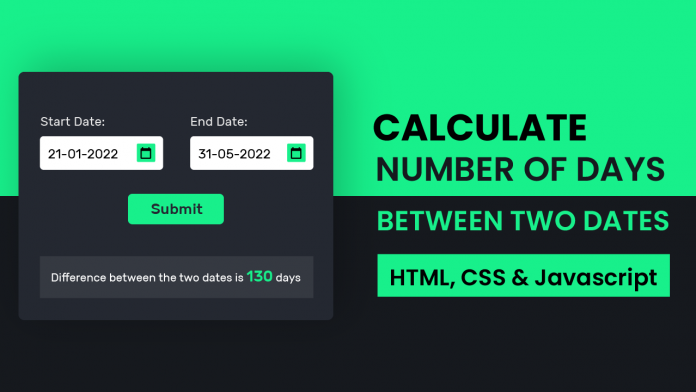
With our folder structure ready, we can start coding. We begin with HTML code. First, copy the code below and paste it into your HTML document. This creates the layout needed for our calculator.
<!DOCTYPE html>
<html lang="en">
  <head>
    <meta name="viewport" content="width=device-width, initial-scale=1.0" />
    <title>Difference Between 2 Dates</title>
    <!-- Google Font -->
    <link
      href="https://fonts.googleapis.com/css2?family=Rubik:wght@400;600&display=swap"
      rel="stylesheet"
    />
    <!-- Stylesheet -->
    <link rel="stylesheet" href="style.css" />
  </head>
  <body>
    <div class="container">
      <div class="inp-wrapper">
        <div class="date-wrapper">
          <label for="date-1">Start Date</label>
          <input type="date" id="date-1" />
        </div>
        <div class="date-wrapper">
          <label for="date-2">End Date</label>
          <input type="date" id="date-2" />
        </div>
      </div>
      <button id="submit">Submit</button>
      <div id="output">Select the dates to get started</div>
    </div>
    <!-- Script -->
    <script src="script.js"></script>
  </body>
</html>
CSS:
Next, we need to style and position these elements. For this purpose we use CSS. Now copy the code below and paste it into your stylesheet.
* {
  padding: 0;
  margin: 0;
  box-sizing: border-box;
  font-family: "Rubik", sans-serif;
}
body {
  height: 100vh;
  background: linear-gradient(#18f08b 50%, #16191e 50%);
}
.container {
  width: 90vw;
  max-width: 37.5em;
  background-color: #242831;
  padding: 6em 3em;
  position: absolute;
  transform: translate(-50%, -50%);
  top: 50%;
  left: 50%;
}
.inp-wrapper {
  display: flex;
  justify-content: space-around;
  gap: 1.2em;
}
label {
  color: #d5d5d5;
  display: block;
  font-weight: 600;
}
input[type="date"] {
  font-size: 16px;
  padding: 1em;
  color: #242831;
  border: none;
  outline: none;
  border-radius: 0.2em;
  margin-top: 0.6em;
}
::-webkit-calendar-picker-indicator {
  background-color: #18f08b;
  padding: 0.2em;
  cursor: pointer;
  border-radius: 0.1em;
}
button {
  display: block;
  background-color: #18f08b;
  color: #16191e;
  font-size: 18px;
  margin: 1em auto 2em auto;
  border: none;
  padding: 0.7em 2em;
  border-radius: 0.3em;
  font-weight: 600;
}

#output {
  background-color: rgba(255, 255, 255, 0.15);
  text-align: center;
  padding: 1em;
  color: #ffffff;
  font-size: 1.2em;
  letter-spacing: 0.05em;
}
#output span {
  color: #18f08b;
  font-size: 1.4em;
  font-weight: 600;
}
@media screen and (max-width: 550px) {
  .container {
    padding: 4em 2em;
  }
  .inp-wrapper {
    flex-direction: column;
  }
  .date-wrapper {
    display: flex;
    align-items: center;
    flex-direction: column;
  }
}
Javascript:
Let us add functionality to this calculator. To implement the functionality we use javascript. Do copy the code provided to you below and paste it into your javascript file. With the functionality incorporated into the calculator, our project is now ready.
//Declaring and initializing variables
let submit = document.getElementById("submit");
let output = document.getElementById("output");

submit.addEventListener("click", () => {
  //Create a Date object from input value
  let date1 = new Date(document.getElementById("date-1").value);
  let date2 = new Date(document.getElementById("date-2").value);

  //Check if the input dates are valid
  //If valid calculate the difference
  if (date1.getTime() && date2.getTime()) {
    //Calculate difference in time using getTime function
    //getTime calculates number of years since January 1,1970
    let timeDifference = date2.getTime() - date1.getTime();

    //Since this value is in milliseconds we need to convert it into days
    //We want the difference to be a non-negative number. Hence we use Math.abs()
    let dayDifference = Math.abs(timeDifference / (1000 * 3600 * 24));
    output.innerHTML = `Difference between the two dates is <span>${dayDifference}</span> days`;
  }

  //Else display that the input is valid
  else {
    output.innerHTML = "Please select a valid date";
  }
});
If you face any issues while creating this code you can download the source code by clicking on the ‘download code’ button below. I would love to hear from you, so if you have any queries, suggestions or feedback drop them in the comments below.
Happy coding!


