Video Tutorial:
If you would prefer to learn by coding along with a video tutorial rather than reading this blog post, check out the video down below. Also, subscribe to my youtube channel where I regularly post new tutorials and tips related to web development. I even post interesting tricks and resources that will further help you improve your web development skills.
Project Folder Structure:
Before we start coding, let us look at the project folder structure. We create a project folder – ‘Responsive Features Section’. Inside this folder, we have two files. The first file is index.html. It is an HTML document. The next file is style.css which is the stylesheet.
HTML:
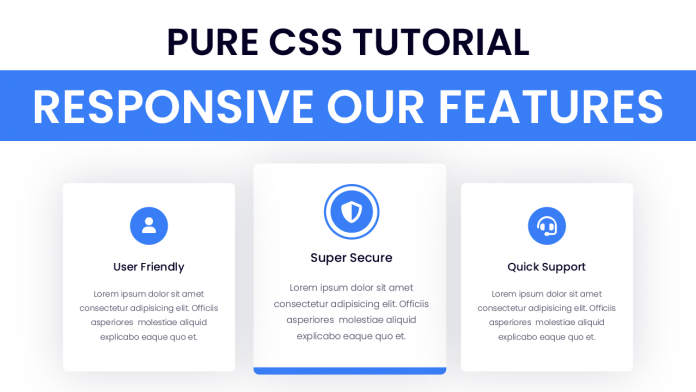
We start with the HTML code. The HTML code creates the layout needed for the ‘Our Features’ section. Firstly copy the code below and paste it into your HTML file. The HTML code consists of two divs with the class name ‘row’. Inside the second ‘row’ div we create three columns. Each of these columns consists of a card.
<!DOCTYPE html>
<html lang="en">
  <head>
    <meta name="viewport" content="width=device-width, initial-scale=1.0" />
    <title>Responsive Features Section</title>
    <!-- Font Awesome CDN -->
    <link
      rel="stylesheet"
      href="https://cdnjs.cloudflare.com/ajax/libs/font-awesome/6.1.1/css/all.min.css"
    />
    <!-- Google Fonts -->
    <link
      href="https://fonts.googleapis.com/css2?family=Poppins:wght@400;600&display=swap"
      rel="stylesheet"
    />
    <!-- Stylesheet -->
    <link rel="stylesheet" href="style.css" />
  </head>
  <body>
    <section>
      <div class="row">
        <h1>Our Features</h1>
      </div>
      <div class="row">
        <!-- Column One -->
        <div class="column">
          <div class="card">
            <div class="icon">
              <i class="fa-solid fa-user"></i>
            </div>
            <h3>User Friendly</h3>
            <p>
              Lorem ipsum dolor sit amet consectetur adipisicing elit. Officiis
              asperiores natus ad molestiae aliquid explicabo. Iste eaque quo et
              commodi.
            </p>
          </div>
        </div>
        <!-- Column Two -->
        <div class="column">
          <div class="card">
            <div class="icon">
              <i class="fa-solid fa-shield-halved"></i>
            </div>
            <h3>Super Secure</h3>
            <p>
              Lorem ipsum dolor sit amet consectetur adipisicing elit. Officiis
              asperiores natus ad molestiae aliquid explicabo. Iste eaque quo et
              commodi.
            </p>
          </div>
        </div>
        <!-- Column Three -->
        <div class="column">
          <div class="card">
            <div class="icon">
              <i class="fa-solid fa-headset"></i>
            </div>
            <h3>Quick Support</h3>
            <p>
              Lorem ipsum dolor sit amet consectetur adipisicing elit. Officiis
              asperiores natus ad molestiae aliquid explicabo. Iste eaque quo et
              commodi.
            </p>
          </div>
        </div>
      </div>
    </section>
  </body>
</html>
CSS:
Now let us style this section and make it responsive using CSS. Now copy the code provided to you below and paste it into your stylesheet. We use the flex layout combined with media queries to create a responsive design. We define the breakpoints for media queries at ‘min-width:768px’ and ‘min-width:992px’.
* {
  padding: 0;
  margin: 0;
  box-sizing: border-box;
  font-family: "Poppins", sans-serif;
}
.row {
  display: flex;
  flex-wrap: wrap;
}
.row h1 {
  width: 100%;
  text-align: center;
  font-size: 3.75em;
  margin: 0.6em 0;
  font-weight: 600;
  color: #070024;
}
.column {
  padding: 1em;
}
.card {
  padding: 3.1em 1.25em;
  text-align: center;
  background: linear-gradient(0deg, #397ef6 10px, transparent 10px);
  background-repeat: no-repeat;
  background-position: 0 0.62em;
  box-shadow: 0 0 2.5em rgba(0, 0, 0, 0.15);
  border-radius: 0.5em;
  transition: 0.5s;
  cursor: pointer;
}
.card .icon {
  font-size: 2.5em;
  height: 2em;
  width: 2em;
  margin: auto;
  background-color: #397ef6;
  display: grid;
  place-items: center;
  border-radius: 50%;
  color: #ffffff;
}
.icon:before {
  position: absolute;
  content: "";
  height: 1.5em;
  width: 1.5em;
  border: 0.12em solid #397ef6;
  border-radius: 50%;
  transition: 0.5s;
}
.card h3 {
  font-size: 1.3em;
  margin: 1em 0 1.4em 0;
  font-weight: 600;
  letter-spacing: 0.3px;
  color: #070024;
}
.card p {
  line-height: 2em;
  color: #625a71;
}
.card:hover {
  background-position: 0;
}
.card:hover .icon:before {
  height: 2.25em;
  width: 2.25em;
}
@media screen and (min-width: 768px) {
  section {
    padding: 1em 7em;
  }
}
@media screen and (min-width: 992px) {
  section {
    padding: 1em;
  }
  .card {
    padding: 5em 2em;
  }
  .column {
    flex: 0 0 33.33%;
    max-width: 33.33%;
    padding: 0 1em;
  }
}
That’s it for this tutorial. If you face any issues while creating this code, you can download the source code by clicking on the download code button below. Also, post your queries, suggestions and feedback in the comments below.
Happy Coding!


