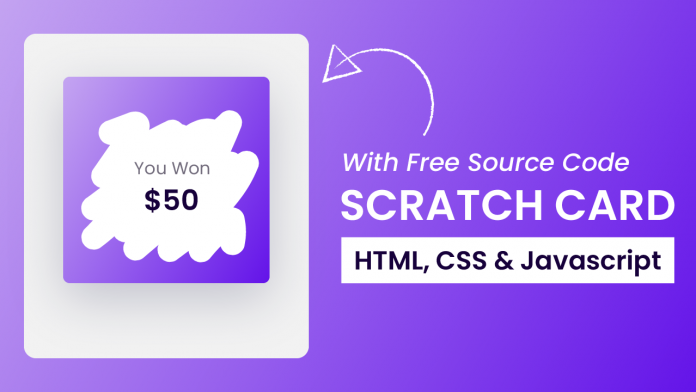
Hey everyone. Welcome to today’s tutorial. In today’s tutorial, we will learn how to create a scratch card.
To create this scratch card, we need HTML, CSS and Javascript. Basic knowledge of Canvas might come in handy for this project, but it isn’t necessary.
This is an intermediate-level javascript project. If you are looking for some other projects to improve your javascript skills, you should check out this playlist here. This playlist consists of 100+ Javascript projects.
The difficulty level of these projects varies from simple to quite complex ones. Hence this playlist is suitable for all kinds of javascript learners, be they javascript beginners or javascript experts.
Let us look at how this project works. This project consists of a canvas that has to be scratched by the user. To scratch this canvas, the user can either use a mouse or touch it. By moving the mouse over the canvas the card is scratched. We reveal some code/ text/ image underling the canvas by scratching the upper canvas.
Video Tutorial:
If you are interested to learn this by watching a video tutorial rather than reading this blog post you can check out the video down below. If you like the video, subscribe to my youtube channel, where I post new tips, tricks and tutorials related to web development every alternate day.
Along with these resources, I also post multiple choice questions based on HTML, CSS and Javascript that will help you with interviews.
Project Folder Structure:
Before we start coding, let us create the project folder structure. We create a project folder called – ‘Scratch Card’. Inside this project, we have three files. These files are index.html, style.css and script.js. The first file is the HTML document. The next one is the stylesheet and finally, we have the script file.
HTML:
We start with the HTML code. The HTML code creates elements necessary to build the structure of our scratch card. First, copy the code below and paste it into your HTML document.
<!DOCTYPE html>
<html lang="en">
  <head>
    <meta name="viewport" content="width=device-width, initial-scale=1.0" />
    <title>Scratch Card</title>
    <!-- Google Fonts -->
    <link
      href="https://fonts.googleapis.com/css2?family=Poppins:wght@400;600&display=swap"
      rel="stylesheet"
    />
    <!-- Stylesheet -->
    <link rel="stylesheet" href="style.css" />
  </head>
  <body>
    <div class="container">
      <div class="base">
        <h4>You Won</h4>
        <h3>$10</h3>
      </div>
      <canvas id="scratch" width="200" height="200"></canvas>
    </div>
    <!-- Script -->
    <script src="script.js"></script>
  </body>
</html>
CSS:
With CSS, we style the scratch card according to our desired theme. For this copy, the code provided to you below and paste it into your stylesheet.
* {
  padding: 0;
  margin: 0;
  box-sizing: border-box;
}
body {
  height: 100vh;
  background: linear-gradient(135deg, #c3a3f1, #6414e9);
}
.container {
  width: 31em;
  height: 31em;
  background-color: #f5f5f5;
  position: absolute;
  transform: translate(-50%, -50%);
  top: 50%;
  left: 50%;
  border-radius: 0.6em;
}
.base,
#scratch {
  height: 200px;
  width: 200px;
  position: absolute;
  transform: translate(-50%, -50%);
  top: 50%;
  left: 50%;
  text-align: center;
  cursor: grabbing;
  border-radius: 0.3em;
}
.base {
  background-color: #ffffff;
  font-family: "Poppins", sans-serif;
  display: flex;
  flex-direction: column;
  align-items: center;
  justify-content: center;
  box-shadow: 0 1.2em 2.5em rgba(16, 2, 96, 0.15);
}
.base h3 {
  font-weight: 600;
  font-size: 1.5em;
  color: #17013b;
}
.base h4 {
  font-weight: 400;
  color: #746e7e;
}
#scratch {
  -webkit-tap-highlight-color: transparent;
  -webkit-touch-callout: none;
  -webkit-user-select: none;
  user-select: none;
}
Javascript:
Finally, we implement the logic of this code. To do that, copy the code below and paste it into your script file.
let canvas = document.getElementById("scratch");
let context = canvas.getContext("2d");

const init = () => {
  let gradientColor = context.createLinearGradient(0, 0, 135, 135);
  gradientColor.addColorStop(0, "#c3a3f1");
  gradientColor.addColorStop(1, "#6414e9");
  context.fillStyle = gradientColor;
  context.fillRect(0, 0, 200, 200);
};

//initially mouse X and mouse Y positions are 0
let mouseX = 0;
let mouseY = 0;
let isDragged = false;

//Events for touch and mouse
let events = {
  mouse: {
    down: "mousedown",
    move: "mousemove",
    up: "mouseup",
  },
  touch: {
    down: "touchstart",
    move: "touchmove",
    up: "touchend",
  },
};

let deviceType = "";

//Detech touch device
const isTouchDevice = () => {
  try {
    //We try to create TouchEvent. It would fail for desktops and throw error.
    document.createEvent("TouchEvent");
    deviceType = "touch";
    return true;
  } catch (e) {
    deviceType = "mouse";
    return false;
  }
};

//Get left and top of canvas
let rectLeft = canvas.getBoundingClientRect().left;
let rectTop = canvas.getBoundingClientRect().top;

//Exact x and y position of mouse/touch
const getXY = (e) => {
  mouseX = (!isTouchDevice() ? e.pageX : e.touches[0].pageX) - rectLeft;
  mouseY = (!isTouchDevice() ? e.pageY : e.touches[0].pageY) - rectTop;
};

isTouchDevice();
//Start Scratch
canvas.addEventListener(events[deviceType].down, (event) => {
  isDragged = true;
  //Get x and y position
  getXY(event);
  scratch(mouseX, mouseY);
});

//mousemove/touchmove
canvas.addEventListener(events[deviceType].move, (event) => {
  if (!isTouchDevice()) {
    event.preventDefault();
  }
  if (isDragged) {
    getXY(event);
    scratch(mouseX, mouseY);
  }
});

//stop drawing
canvas.addEventListener(events[deviceType].up, () => {
  isDragged = false;
});

//If mouse leaves the square
canvas.addEventListener("mouseleave", () => {
  isDragged = false;
});

const scratch = (x, y) => {
  //destination-out draws new shapes behind the existing canvas content
  context.globalCompositeOperation = "destination-out";
  context.beginPath();
  //arc makes circle - x,y,radius,start angle,end angle
  context.arc(x, y, 12, 0, 2 * Math.PI);
  context.fill();
};

window.onload = init();
That’s it for this tutorial. Your scratch card is now ready. If you face any issues while creating this code, you can download the source code by clicking on the ‘Download Code’ button below. Also, if you have any queries, suggestions, or feedback do drop them below.
Happy Coding!


Hi, great script!
I was wondering if you know how to get the percentage of the canvas filled. I would like to display a text when the user has scratched 50% of the canvas.
Would you help me with it?
Thanks in advanced.
How do I add multiple cards to a page?