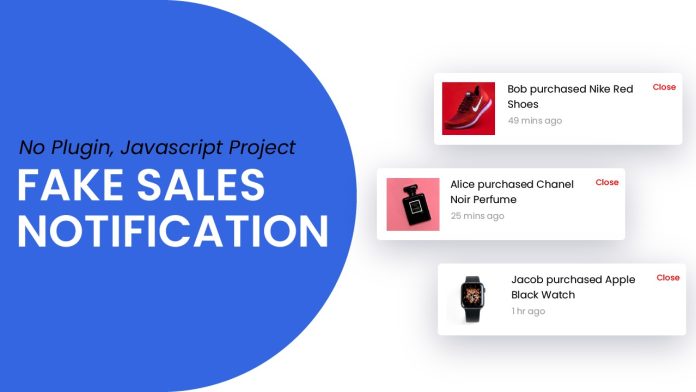
Introduction:
In today’s tutorial, we’ll dive into the world of web development and learn how to create a Fake Sales Notification using HTML, CSS, and JavaScript. This interactive feature will display random purchase notifications, mimicking real-time customer engagement. By the end of this tutorial, you’ll have a better understanding of DOM manipulation, event handling, and creating engaging user interfaces.
Things You Will Learn:
- DOM Manipulation: Discover how to manipulate the Document Object Model (DOM) to dynamically update content on a webpage without requiring a full page refresh.
- Event Handling: Learn how to handle user interactions by adding event listeners to DOM elements, allowing you to execute specific actions based on user behavior.
- Randomization: Explore techniques for generating random data, such as selecting a random name from an array or generating a random time interval.
- CSS Styling: Enhance the visual appeal of your project by applying CSS styles to create an appealing and user-friendly design.
Video Tutorial:
To complement this written tutorial, you can find a detailed video walkthrough on my YouTube channel:
Project Folder Structure:
To get started, let’s set up the project folder structure:
- index.html
- style.css
- script.js
- product images
HTML:
The HTML file contains the necessary elements for the alert:
<!DOCTYPE html>
<html lang="en">
  <head>
    <meta charset="UTF-8" />
    <meta name="viewport" content="width=device-width, initial-scale=1.0" />
    <title>Fake Sales Notification</title>
    <!-- Google Fonts -->
    <link
      href="https://fonts.googleapis.com/css2?family=Poppins&display=swap"
      rel="stylesheet"
    />
    <!-- Stylesheet -->
    <link rel="stylesheet" href="style.css" />
  </head>
  <body>
    <div id="product-alert">
      <div class="product-info">
        <img src="" alt="Product Image" id="product-image" />
        <div id="product-text"></div>
      </div>
      <button id="close-btn">Close</button>
    </div>
    <!-- Script -->
    <script src="script.js"></script>
  </body>
</html>
CSS:
The CSS file is responsible for creating an appealing user interface:
* {
  margin: 0;
  padding: 0;
  font-family: "Poppins", sans-serif;
}
#alert-btn {
  cursor: pointer;
}
#product-alert {
  width: 350px;
  position: fixed;
  bottom: 20px;
  right: 20px;
  padding: 10px;
  border-radius: 5px;
  box-shadow: 0 2px 5px rgba(0, 0, 0, 0.2);
  display: none;
  align-items: flex-start;
  gap: 0.5em;
}
.product-info {
  display: flex;
}
.product-info img {
  width: 100px;
  height: 100px;
  margin-right: 10px;
}
.message {
  font-size: 16px;
}
.time {
  font-size: 14px;
  margin-top: 16px;
  color: #a0a0a0;
}
#close-btn {
  background-color: transparent;
  color: red;
  border: none;
  outline: none;
}
JS:
The JavaScript file contains the logic to handle randomly creating and displaying the alert:
const productAlert = document.getElementById("product-alert");
const closeAlertBtn = document.getElementById("close-btn");
const productText = document.getElementById("product-text");
const productImage = document.getElementById("product-image");
const names = ["John", "Alice", "Bob", "Emma", "Betty"];
const products = [
  {
    name: "Nike Red Shoes",
    image: "product-image-1.jpg",
  },
  {
    name: "Chanel Noir Perfume",
    image: "product-image-2.jpg",
  },
  {
    name: "Awesome Black Shirt",
    image: "product-image-3.jpg",
  },
  {
    name: "Ray-Ban Sunglasses",
    image: "product-image-4.jpg",
  },
  {
    name: "Black Apple Watch",
    image: "product-image-5.jpg",
  },
];

function getRandomItemFromArray(arr) {
  return arr[Math.floor(Math.random() * arr.length)];
}

function getRandomTime() {
  return Math.floor(Math.random() * 59) + 1;
}

const getRandomDisplayTime = () => Math.random() * (8 - 3) + 3;
const showAlert = () => {
  const randomName = getRandomItemFromArray(names);
  const randomProduct = getRandomItemFromArray(products);
  const { name, image } = randomProduct;
  productImage.src = image;
  productText.innerHTML = `<p class="message">${randomName} purchased ${name}</p> <p class="time">${getRandomTime()} mins ago</p>`;
  productAlert.style.display = "flex";
};

closeAlertBtn.addEventListener("click", () => {
  productAlert.style.display = "none";
  setTimeout(showAlert, Math.floor(getRandomDisplayTime()) * 1000);
});

setTimeout(showAlert, Math.floor(getRandomDisplayTime()) * 1000);
Conclusion:
Congratulations! You’ve successfully created a dynamic product alert feature using HTML, CSS, and JavaScript. Through this tutorial, you’ve gained insights into DOM manipulation, event handling, and randomization techniques. By following the step-by-step instructions, you’ve built a foundation for creating engaging and interactive web applications.


thanks for this amazing projects