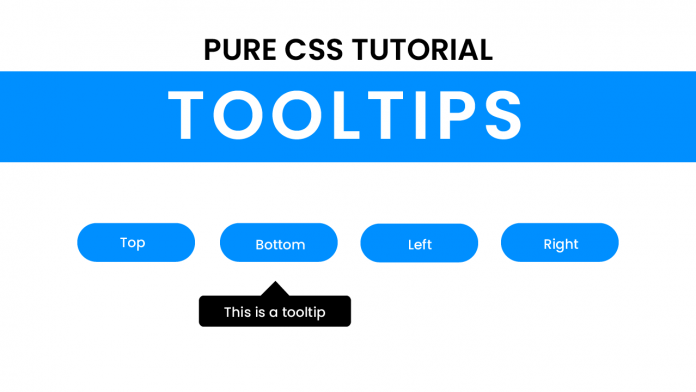
Hey everyone. Welcome to today’s tutorial. In today’s tutorial, we will learn how to create Tooltips. To build this project we would need HTML and CSS. Let’s discover how to build this project in a few simple and easy-to-follow steps.
Video Tutorial:
I would suggest you to watch the video below for a better understanding of how we have implemented the functionality of this project. If you find the video helpful give it a like and subscribe to my YouTube channel where I post new tips, tricks, and tutorials related to HTML, CSS, and Javascript.
Project Folder Structure:
I would suggest you to watch the video below for a better understanding of how we have implemented the functionality of this project. If you find the video helpful give it a like and subscribe to my YouTube channel where I post new tips, tricks, and tutorials related to HTML, CSS, and Javascript.
HTML:
We begin with the HTML Code. First, create a file called – ‘index.html’. Copy the code below and paste it into your HTML file. We simply create 4 divs to display a tooltip in each direction.
<!DOCTYPE html>
<html lang="en">
  <head>
    <meta name="viewport" content="width=device-width, initial-scale=1.0" />
    <title>Tooltips</title>
    <!-- Google Fonts -->
    <link
      href="https://fonts.googleapis.com/css2?family=Poppins&display=swap"
      rel="stylesheet"
    />
    <!-- Stylesheet -->
    <link rel="stylesheet" href="style.css" />
  </head>
  <body>
    <button class="tooltip tooltip-top">Top</button>
    <button class="tooltip tooltip-bottom">Bottom</button>
    <button class="tooltip tooltip-left">Left</button>
    <button class="tooltip tooltip-right">Right</button>
  </body>
</html>
CSS:
Next, we provide styles to our tooltips using CSS. For this copy, the code provided to you below and paste it into your stylesheet.
Before styling the tooltips we provide some basic styling like alignment, size, and color to each of the divs. Coming to the tooltips, each tooltip has a rectangular part and the triangle part.
We use the pseudo elements `before` and `after` for representing these two parts. The `before` part is used to make the rectangle while the `after` part represents the triangle. The important aspect in creating all the tooltips is to maintain proper alignment and sizing, apart from this all tooltips have the same styling.
Initially, the tooltips are set to `display: none` to hide them and the tooltips will only be displayed when the user hovers over the div.
* {
  font-family: "Poppins", sans-serif;
}
.tooltip {
  position: relative;
  display: block;
  margin: auto;
  font-size: 1.2em;
  background-color: #1f74e1;
  color: #ffffff;
  text-align: center;
  padding: 0.8em 2em;
  border-radius: 0.5em;
  border: none;
  cursor: pointer;
  margin-top: 5em;
}

/* Top Tooltip */
.tooltip-top:before {
  content: "Demo Tooltip";
  font-size: 0.8em;
  position: absolute;
  width: 150%;
  background-color: #000000;
  transform: translateX(-50%);
  left: 50%;
  top: -4.5em;
  padding: 0.8em 1em;
  display: none;
}
.tooltip-top:after {
  content: "";
  position: absolute;
  border-top: 1.25em solid black;
  border-left: 1.25em solid transparent;
  border-right: 1.25em solid transparent;
  transform: translateX(-50%);
  left: 50%;
  top: -1.5em;
  display: none;
}

/* Bottom Tooltip */
.tooltip-bottom:before {
  content: "Demo Tooltip";
  font-size: 0.8em;
  position: absolute;
  width: 150%;
  background-color: #000000;
  padding: 0.8em 1em;
  transform: translateX(-50%);
  left: 50%;
  bottom: -4.5em;
  display: none;
}
.tooltip-bottom:after {
  content: "";
  position: absolute;
  border-bottom: 1.25em solid black;
  border-left: 1.25em solid transparent;
  border-right: 1.25em solid transparent;
  transform: translateX(-50%);
  left: 50%;
  bottom: -1.5em;
  display: none;
}

/* Left Tooltip*/
.tooltip-left:before {
  content: "Demo Tooltip";
  font-size: 0.8em;
  position: absolute;
  width: 150%;
  background-color: #000000;
  padding: 0.8em 1em;
  transform: translateY(-50%);
  top: 50%;
  left: calc(-150% - 4em);
  display: none;
}
.tooltip-left:after {
  content: "";
  position: absolute;
  height: 0;
  border-left: 1.25em solid black;
  border-top: 1.25em solid transparent;
  border-bottom: 1.25em solid transparent;
  bottom: 0.3em;
  left: -2.2em;
  display: none;
}

/* Right Tooltip*/
.tooltip-right:before {
  content: "Demo Tooltip";
  font-size: 0.8em;
  position: absolute;
  width: 150%;
  background-color: #000000;
  padding: 0.8em 1em;
  transform: translateY(-50%);
  top: 50%;
  right: calc(-150% - 4em);

  display: none;
}
.tooltip-right:after {
  content: "";
  position: absolute;
  height: 0;
  border-right: 1.25em solid black;
  border-top: 1.25em solid transparent;
  border-bottom: 1.25em solid transparent;
  bottom: 0.3em;
  right: -2.2em;

  display: none;
}

.tooltip:hover:before {
  display: block;
}
.tooltip:hover:after {
  display: block;
}
That’s all for this tutorial. If you face any issues while creating this code you can download the source code by clicking on the ‘Download Code’ button below then all you have to do is extract the files from the zipped folder.


