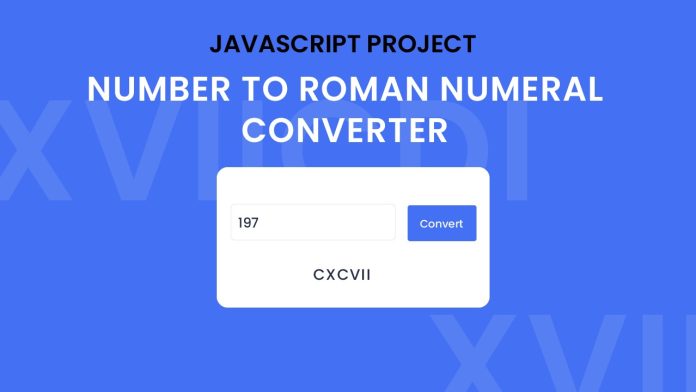
Introduction:
In this tutorial, we will learn how to convert numbers to Roman numerals using JavaScript. Roman numerals have a rich historical significance and are still used in various contexts today. By the end of this tutorial, you will have a solid understanding of how to build a simple web application that can convert numeric input into Roman numerals. So, let’s dive in and explore the world of Roman numerals!
Things You Will Learn:
- Building a basic web application using HTML, CSS, and JavaScript.
- Handling user input and performing validation.
- Converting numeric values to Roman numerals using an algorithm.
- Manipulating the DOM to display the converted result dynamically.
Video Tutorial:
To complement this tutorial, you can watch the video tutorial on my YouTube channel.
Project Folder Structure:
Before we begin, let’s set up the project folder structure. Here’s a simple structure for this tutorial:
- index.html
- style.css
- script.js
HTML:
Let’s start by creating the HTML structure for our web application. Open the index.html file and add the following code:
<!DOCTYPE html>
<html lang="en">
  <head>
    <meta name="viewport" content="width=device-width, initial-scale=1.0" />
    <title>Number To Roman Converter</title>
    <!-- Stylesheet -->
    <link rel="stylesheet" href="style.css" />
  </head>
  <body>
    <div class="container">
      <div class="input-wrapper">
        <input type="number" id="input" placeholder="Enter Number Here..." />
        <button type="submit" id="submit">Convert</button>
      </div>
      <p id="output">
        <span>Enter The Number & Hit Convert</span>
      </p>
      <p id="error"></p>
    </div>
    <!-- Script -->
    <script src="script.js"></script>
  </body>
</html>
CSS:
To add some basic styling to our web application, create a file named style.css and include the following code:
* {
  padding: 0;
  margin: 0;
  box-sizing: border-box;
  font-family: "Poppins", sans-serif;
}
body {
  background-color: #4470f3;
}
.container {
  background-color: #ffffff;
  width: min(90%, 450px);
  position: absolute;
  transform: translate(-50%, -50%);
  left: 50%;
  top: 50%;
  padding: 3em 2em;
  border-radius: 0.8em;
}
.input-wrapper {
  display: grid;
  grid-template-columns: 9fr 3fr;
  gap: 1em;
}
input {
  padding: 1em 0.5em;
  color: #262e45;
  border: 2px solid #e3e4ef;
}
input:focus {
  border-color: #4470f3;
}
button {
  border: none;
  background-color: #4470f3;
  color: #ffffff;
}
input,
button {
  font-size: 1em;
  outline: none;
  border-radius: 0.5em;
}
#error {
  background-color: #fc4747;
  text-align: center;
  color: #ffffff;
  margin-top: 0.5em;
}
#output {
  font-size: 1.2em;
  text-align: center;
  font-weight: 600;
  color: #262e45;
  margin-top: 2em;
}
#output span {
  font-size: 0.9em;
}
JS:
Now, create a file named script.js and implement the JavaScript logic as follows:
let input = document.getElementById("input");
let button = document.getElementById("submit");
let errorMessage = document.getElementById("error");
let output = document.getElementById("output");

const romanObject = {
  M: 1000,
  CM: 900,
  D: 500,
  CD: 400,
  C: 100,
  XC: 90,
  L: 50,
  XL: 40,
  XXX: 30,
  XX: 20,
  X: 10,
  IX: 9,
  V: 5,
  IV: 4,
  I: 1,
};

button.addEventListener("click", () => {
  inputToRoman(input.value);
  input.value = "";
});

function inputToRoman(num) {
  let number = parseInt(num);

  if (num.trim().length == 0) {
    errorMessage.innerHTML = "Invalid Input";
    output.innerHTML = "";
    return false;
  }
  if (number > 4999 || number < 1) {
    errorMessage.innerHTML = "Input Out Of Range";
    output.innerHTML = "";
    return false;
  }
  errorMessage.innerHTML = "";
  output.innerHTML = "";

  let result = "";
  let romanValues = Object.keys(romanObject);
  romanValues.forEach((key) => {
    while (romanObject[key] <= number) {
      number -= romanObject[key];
      result += key;
    }
  });
  output.innerHTML = result;
}
Conclusion:
Congratulations! You have successfully built a web application that converts numeric input into Roman numerals. Throughout this tutorial, we learned how to create a basic HTML structure, apply CSS styling, and implement JavaScript logic to handle user input, validate it, and perform the conversion. Feel free to enhance the application further by adding additional features or improving the user interface. Keep coding and exploring new possibilities!


