Introduction:
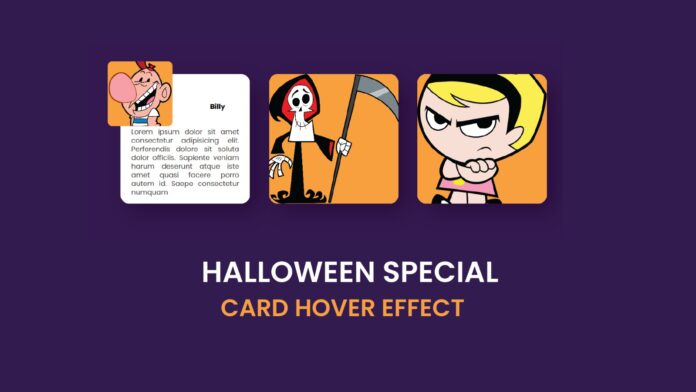
In this tutorial, you will learn how to create an elegant card hover effect using HTML and CSS. When a user hovers over a card, the image inside will shrink and move, creating a visually appealing animation. This type of hover effect adds interactivity and professionalism to your website, making it more engaging for users.
Things You Will Learn:
By the end of this tutorial, you will know how to:
- Structure a card layout in HTML.
- Apply CSS for creating a smooth hover effect.
- Animate images and text with CSS transitions.
Video Tutorial:
Here is the video tutorial for this project. If you like the tutorial subscribe to my YouTube channel. I post new projects based on HTML, CSS and Javascript on my channel regularly.
Project Folder Structure:
Now before we move on to actual coding we create a project folder structure. We name the project folder as – “Card Hover Effect”. Within this folder we have code and image files. These files are:
- index.html
- style.css
- image files
HTML:
We begin with the HTML code. Copy the code below and paste it into your HTML document.
<!DOCTYPE html>
<html lang="en">
  <head>
    <meta name="viewport" content="width=device-width, initial-scale=1.0" />
    <title>Card Hover Effect</title>
    <link rel="stylesheet" href="style.css" />
  </head>
  <body>
    <section>
      <div class="card">
        <figure class="card-1">
          <img src="billy.webp" />
        </figure>
        <div class="title">
          <h2>Billy</h2>
        </div>
        <div class="content">
          Lorem ipsum dolor sit amet consectetur adipisicing elit. Perferendis
          dolore sit soluta dolor officiis. Sapiente veniam harum deserunt atque
          iste amet quasi facere porro autem id. Saepe consectetur numquam
        </div>
      </div>

      <div class="card">
        <figure class="card-2">
          <img src="Grim Reaper.webp" />
        </figure>
        <div class="title">
          <h2>Grim Reaper</h2>
        </div>
        <div class="content">
          Lorem ipsum dolor sit amet consectetur adipisicing elit. Perferendis
          dolore sit soluta dolor officiis. Sapiente veniam harum deserunt atque
          iste amet quasi facere porro autem id. Saepe consectetur numquam
        </div>
      </div>

      <div class="card">
        <figure class="card-3">
          <img src="Mandy.webp" />
        </figure>
        <div class="title">
          <h2>Mandy</h2>
        </div>
        <div class="content">
          Lorem ipsum dolor sit amet consectetur adipisicing elit. Perferendis
          dolore sit soluta dolor officiis. Sapiente veniam harum deserunt atque
          iste amet quasi facere porro autem id. Saepe consectetur numquam
        </div>
      </div>
    </section>
  </body>
</html>
CSS:
Next, we style our card using CSS. For this copy, the code provided to you below and paste it into your stylesheet.
* {
  margin: 0;
  padding: 0;
  box-sizing: border-box;
  font-family: "Poppins", sans-serif;
}
body {
  height: 90vh;
  display: grid;
  place-items: center;
  background: #212327;
}
.card {
  display: inline-block;
  border-radius: 20px;
  width: 300px;
  height: 300px;
  position: relative;
  cursor: pointer;
  margin: 40px 20px;
  background-color: #ffffff;
}
figure {
  position: absolute;
  width: 100%;
  height: 100%;
  left: 0;
  top: 0;
  transform-origin: 0% 0%;
  transition: all 850ms ease-in-out;
  z-index: 2;
  border-radius: 20px;
  background-color: #fda03d;
}
.card:hover figure {
  top: -10%;
  left: -10%;
  transform: scale(0.5);
}
img {
  width: 100%;
  height: 100%;
  object-fit: cover;
  border-radius: 32px;
}
.title {
  position: absolute;
  width: 50%;
  height: 50%;
  right: 0;
  display: grid;
  place-items: center;
  z-index: 1;
}
.title h2 {
  font-size: 16px;
  text-align: center;
}
.content {
  position: absolute;
  bottom: 0;
  padding: 16px 25px;
  z-index: 1;
  color: #505050;
  text-align: justify;
  line-height: 20px;
}
Conclusion:
This tutorial taught you how to create an interactive card hover effect using HTML and CSS. The hover effect enhances the visual appeal of your website, adding a dynamic user experience. You can easily customize the effect with different image sizes, animations, or colors. Try experimenting with these styles and add your own unique touch!


