Introduction:
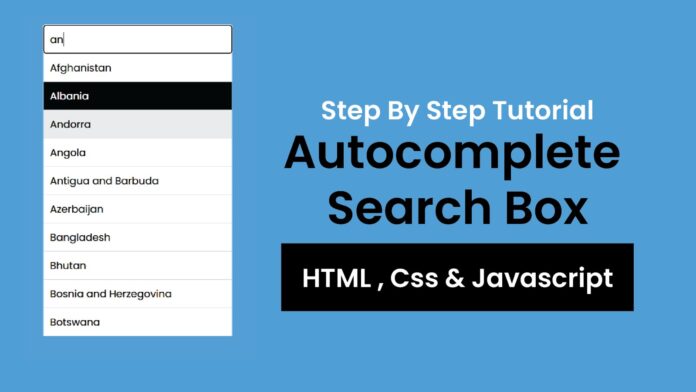
Autocomplete search functionality enhances the user experience by providing instant suggestions while typing. In this tutorial, you will learn how to build a JavaScript-powered autocomplete search feature that filters through an array of countries. This simple yet powerful feature can easily integrate into websites or applications, helping users find relevant options quickly.
Things You Will Learn:
In this tutorial, you will:
- Setting up a basic project structure for an autocomplete feature
- Building an HTML input field and dropdown list for displaying suggestions
- Using JavaScript to handle user input and filter suggestions
- Adding keyboard navigation and mouse click functionality
- Implementing CSS to style the autocomplete suggestions
Video Tutorial:
If you are interested to learn by watching a video tutorial rather reading a blog post you can check out the video down below. Also subscribe to my YouTube channel where I post new tutorials every alternate day.
Project Folder Structure:
Before we start coding we take a look at the project folder structure. We start by creating a folder called – ‘Autocomplete Search Bar’. Inside this folder we have 3 files. These files are:
- index.html
- style.css
- script.js
HTML:
We begin with the HTML code. Copy the code below and paste it into your HTML document.
<!DOCTYPE html>
<html lang="en">
<head>
<meta name="viewport" content="width=device-width, initial-scale=1.0" />
<title>Autocomplete Search</title>
<!-- Google Font -->
<link
href="https://fonts.googleapis.com/css2?family=Poppins&display=swap"
rel="stylesheet"
/>
<link rel="stylesheet" href="style.css" />
</head>
<body>
<div class="autocomplete">
<input id="search-input" type="text" placeholder="Search..." />
<div id="autocomplete-list" class="autocomplete-items"></div>
</div>

<script src="script.js"></script>
</body>
</html>
CSS:
Enhance the visual look by pasting the CSS code below into your stylesheet.
* {
box-sizing: border-box;
font-family: "Poppins", sans-serif;
background-color: #30a6ff;
}
.autocomplete {
position: relative;
display: inline-block;
width: 300px;
position: absolute;
transform: translate(-50%);
left: 50%;
top: 20px;
}
input[type="text"] {
width: 100%;
padding: 10px;
font-size: 16px;
border: none;
border-radius: 4px;
background-color: #ffffff;
}
.autocomplete-items {
position: absolute;
background-color: #30a6ff;
border-bottom: none;
z-index: 99;
top: 100%;
left: 0;
right: 0;
}
.autocomplete-items div {
padding: 10px;
cursor: pointer;
background-color: #ffffff;
border-bottom: 1px solid #d4d4d4;
}
.autocomplete-items div:hover {
background-color: #e9e9e9;
}
.autocomplete-active {
background-color: #000000 !important;
color: #ffffff;
}
JS:
Finally, we add functionality using Javascript. For this once again copy the code below and paste it into your script file.
const countries = [
"Afghanistan",
"Albania",
"Algeria",
"Andorra",
"Angola",
"Antigua and Barbuda",
"Argentina",
"Armenia",
"Australia",
"Austria",
"Azerbaijan",
"Bahamas",
"Bahrain",
"Bangladesh",
"Barbados",
"Belarus",
"Belgium",
"Belize",
"Benin",
"Bhutan",
"Bolivia",
"Bosnia and Herzegovina",
"Botswana",
"Brazil",
"Brunei",
"Bulgaria",
"Burkina Faso",
];

//get the input and the autocomplete container elements
const input = document.getElementById("search-input");
const autocompleteList = document.getElementById("autocomplete-list");

let currentFocus = -1; //To track the currently active suggestiom

//Part 1: Handling user input and filtering suggestions
input.addEventListener("input", function () {
const query = this.value.toLowerCase();
//Get user input and convert to lowercase for case-insensitive matching
autocompleteList.innerHTML = ""; //Clear previous autocomplete suggestions
currentFocus = -1; //Reset the focus index when typing new input

//If the input is empty dont show any suggestions
if (!query) return;

//Filter the countries based on user input
const filteredSuggestions = countries.filter((country) =>
country.toLowerCase().includes(query)
);
//Part 2:Create suggestions list dynamically
filteredSuggestions.forEach((country) => {
const item = document.createElement("div");
item.innerHTML = country; //Set the suggestion text
item.addEventListener("click", function () {
input.value = country; //set the suggestion text
autocompleteList.innerHTML = ""; //Clear the suggestion list after selection
});
autocompleteList.appendChild(item); //Add the suggestion to list
});
});
//Part 3: handling keyboard navigation(arrow keys and enter)
input.addEventListener("keydown", function (e) {
let items = autocompleteList.getElementsByTagName("div");
//get all suggestions div elements
if (e.key === "ArrowDown") {
currentFocus++;
highlightItem(items);
} else if (e.key === "ArrowUp") {
currentFocus--;
highlightItem(items);
} else if (e.key === "Enter") {
e.preventDefault();
if (currentFocus > -1 && items[currentFocus]) {
items[currentFocus].click();
}
}
});
//Part 4: Function to highlight the current item
function highlightItem(items) {
if (!items) return;
removeActive(items);
//Wrap focus withon the bounds of suggestion list
if (currentFocus >= items.length) currentFocus = 0;
if (currentFocus < 0) currentFocus = items.length - 1;
items[currentFocus].classList.add("autocomplete-active");
}
//Part 5: Function to remove the active class from all items
function removeActive(items) {
for (let i = 0; i < items.length; i++) {
items[i].classList.remove("autocomplete-active");
}
}

//Part 6: close the autocomple list is the user click outite tje input field or list
document.addEventListener("click", function (e) {
if (!autocompleteList.contains(e.target) && e.target !== input) {
autocompleteList.innerHTML = "";
}
});
Conclusion:
Congratulations! You now have a fully functional autocomplete search feature. This code provides a simple solution that enhances user experience by displaying suggestions based on input. You can customize it further by adding more countries or integrating it into a broader search feature. Happy coding!


