Introduction:
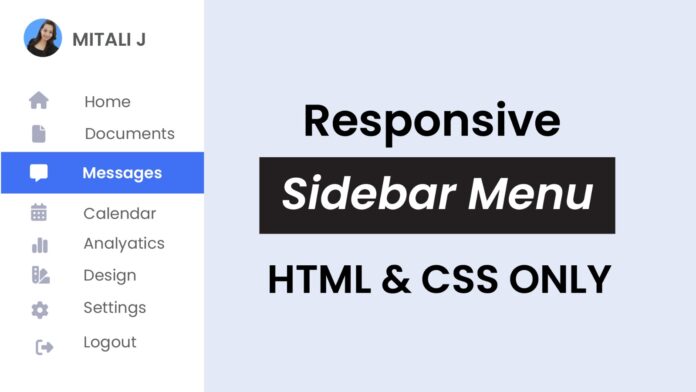
A clean, stylish sidebar with expandable functionality enhances user experience and is essential in many web applications. In this tutorial, we’ll walk through creating an interactive sidebar using only HTML and CSS. This tutorial suits developers looking to add dynamic navigation to their projects with minimal code complexity. The following sections provide step-by-step instructions and code snippets, and we’ve included a video link to guide you through the setup.
Things You Will Learn:
- Creating an expandable sidebar using HTML and CSS
- Applying modern CSS techniques for smooth transitions
- Customizing sidebar styles with CSS
- Implementing responsive and minimalist design elements
Video Tutorial:
I would suggest you to watch the video down below for better understanding on we have implemented the functionality of this project. If you find the video helpful give it a like and subscribe to my YouTube channel where I post new tips, tricks and tutorials related to HTML, CSS and Javascript.
Project Folder Structure:
Now before we move on to actual coding we create a project folder structure. We name the project folder as – ‘Responsive Sidebar Menu’. Within this folder we have 2 files. These files are:
- index.html
- style.css
HTML:
We begin with the HTML code. Copy the code below and paste it into your HTML document.
<!DOCTYPE html>
<html lang="en">
<head>
<meta name="viewport" content="width=device-width, initial-scale=1.0" />
<title>Responsive Side Navigation Menu</title>
<!-- Fontawesome Awesome CDN -->
<link
rel="stylesheet"
href="https://cdnjs.cloudflare.com/ajax/libs/font-awesome/6.6.0/css/all.min.css"
/>
<!-- Stylesheet-->
<link rel="stylesheet" href="style.css" />
</head>
<body>
<div class="sidebar">
<div class="user-profile">
<img src="mitali-photo.png" alt="User image" />
<span class="user-name">Mitali J</span>
</div>
<ul>
<li>
<a href="#">
<i class="fa-solid fa-house"></i>
<span class="text">Home</span>
</a>
</li>
<li>
<a href="#">
<i class="fas fa-file-alt"></i>
<span class="text">Documents</span>
</a>
</li>
<li>
<a href="#">
<i class="fas fa-envelope"></i>
<span class="text">Documents</span>
</a>
</li>
<li>
<a href="#">
<i class="fas fa-calendar-alt"></i>
<span class="text">Calendar</span>
</a>
</li>
<li>
<a href="#">
<i class="fas fa-chart-bar"></i>
<span class="text">Analytics</span>
</a>
</li>
<li>
<a href="#">
<i class="fas fa-paint-brush"></i>
<span class="text">Design</span>
</a>
</li>
<li>
<a href="#">
<i class="fas fa-cog"></i>
<span class="text">Settings</span>
</a>
</li>
<li>
<a href="#">
<i class="fas fa-question-circle"></i>
<span class="text">Help</span>
</a>
</li>
<li>
<a href="#">
<i class="fas fa-sign-out-alt"></i>
<span class="text">Logout</span>
</a>
</li>
</ul>
</ul>
</div>
</body>
</html>
CSS:
Let’s add some style to the layout. Copy the code provided and include it in your stylesheet.
* {
margin: 0;
padding: 0;
box-sizing: border-box;
font-family: "Poppins", sans-serif;
}
body {
background-color: #e3e9f7;
}
.sidebar {
width: 60px;
height: 100vh;
background-color: #ffffff;
position: fixed;
left: 0;
top: 0;
transition: width 0.3s ease;
overflow: hidden;
}
.sidebar:hover {
width: 220px;
}
.sidebar .user-profile {
display: flex;
align-items: center;
padding: 15px;
margin-bottom: 20px;
}
.sidebar .user-profile img {
width: 40px;
height: 40px;
border-radius: 50%;
margin-right: 10px;
transition: all 0.3s ease;
}
.sidebar .user-name {
font-size: 16px;
color: #66586d;
opacity: 0;
transition: opacity 0.3s ease;
}
.sidebar:hover .user-name {
opacity: 1;
}
.sidebar ul {
list-style: none;
}
.sidebar ul li {
display: flex;
align-items: center;
justify-content: flex-start;
}
.sidebar ul li a {
text-decoration: none;
color: #a9abbf;
display: flex;
align-items: center;
padding: 15px;
width: 100%;
transition: background 0.3s ease, color 0.3s ease;
}
.sidebar ul li i {
font-size: 24px;
width: 60px;
text-align: center;
transition: color 0.3 ease;
}
.text {
font-size: 16px;
margin-left: 10px;
white-space: nowrap;
opacity: 0;
transition: opacity 0.3s ease;
}
.sidebar:hover .text {
opacity: 1;
}
.sidebar ul li a:hover {
background-color: #4071f4;
color: #ffffff;
}
Conclusion:
Creating an expandable sidebar with HTML and CSS adds a dynamic navigation element to your project with a sleek, user-friendly design. This tutorial’s simple approach allows for quick setup while offering room for customization based on your project needs. For more guidance, check out the video tutorial on my YouTube channel for a hands-on walkthrough.


