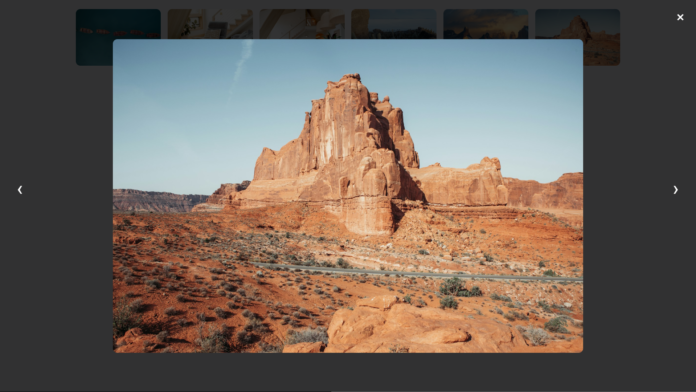
An image gallery with a lightbox effect is a popular and stylish way to display multiple images on a website. With the lightbox feature, users can click on any image to view it in a larger format, with options to navigate between images and close the lightbox easily. In this blog post, we’ll guide you through creating an interactive image gallery with a lightbox effect using HTML, CSS, and JavaScript.
💡 Features of the Image Gallery
- A responsive grid layout for displaying multiple images.
- A lightbox overlay for viewing images in a larger size.
- Navigation controls to view the previous or next image.
- Close functionality to exit the lightbox.
Video Tutorial:
Watch my video tutorial for a detailed explanation and see the code in action! Don’t forget to download the source code provided below.
🛠️ Code Walkthrough
1️⃣ HTML: Structuring the Gallery and Lightbox
Here’s the basic structure of the gallery and lightbox in HTML:
<!DOCTYPE html>
<html lang="en">
<head>
<meta name="viewport" content="width=device-width, initial-scale=1.0" />
<title>Image Gallery With LightBox</title>
<link rel="stylesheet" href="style.css" />
</head>
<body>
<!-- Image Gallery -->
<div class="gallery">
<img src="img-1.jpg" alt="Image-1" data-index="0" />
<img src="img-2.jpg" alt="Image-2" data-index="1" />
<img src="img-3.jpg" alt="Image-3" data-index="2" />
<img src="img-4.jpg" alt="Image-4" data-index="3" />
<img src="img-5.jpg" alt="Image-5" data-index="4" />
<img src="img-6.jpg" alt="Image-6" data-index="5" />
</div>
<!-- Lightbox -->
<div class="lightbox">
<button class="close">×</button>
<button class="prev">‹</button>
<img src="" alt="lightbox image" />
<button class="next">›</button>
</div>
<script src="script.js"></script>
</body>
</html>
2️⃣ CSS: Styling the Gallery and Lightbox
The CSS styles the gallery, making it responsive and visually appealing, and designs the lightbox for an immersive image-viewing experience.
/* General body styling */
body {
  margin: 0;
  padding: 0;
  background-color: #f4f4f9;
  display: flex;
  flex-wrap: wrap;
  justify-content: center;
  gap: 20px;
  padding: 20px;
}

/* Gallery grid layout */
.gallery {
  display: grid;
  grid-template-columns: repeat(auto-fit, minmax(150px, 1fr));
  gap: 15px;
  width: 100%;
  max-width: 1200px;
}

.gallery img {
  width: 100%;
  height: auto;
  border-radius: 10px;
  cursor: pointer;
  transition: transform 0.3s ease;
}

.gallery img:hover {
  transform: scale(1.05);
}

/* Lightbox styling */
.lightbox {
  display: none;
  position: fixed;
  top: 0;
  left: 0;
  width: 100%;
  height: 100%;
  background-color: rgba(0, 0, 0, 0.8);
  justify-content: center;
  align-items: center;
  z-index: 1000;
}

.lightbox img {
  max-width: 80%;
  max-height: 80%;
  border-radius: 10px;
}

.lightbox .prev,
.lightbox .next {
  height: 50px;
  width: 50px;
  position: absolute;
  transform: translateY(-50%);
  font-size: 2.5rem;
  background-color: transparent;
  color: #ffffff;
  padding: 10px;
  border: none;
  cursor: pointer;
  border-radius: 50%;
  z-index: 1001;
}

.lightbox .prev {
  left: 20px;
}

.lightbox .next {
  right: 20px;
}

.lightbox .close {
  position: absolute;
  top: 20px;
  right: 20px;
  font-size: 2rem;
  color: #ffffff;
  background: none;
  cursor: pointer;
  border: none;
  z-index: 1001;
}
Key Features:
- Responsive Design: The
grid-template-columnsensures the gallery adjusts to different screen sizes. - Hover Effect: Images slightly scale up when hovered for better interactivity.
- Lightbox Overlay: The dark background with a centered image focuses user attention.
3️⃣ JavaScript: Adding Interactivity
The JavaScript adds functionality to open the lightbox, navigate through images, and close the lightbox.
const gallery = document.querySelector(".gallery");
const lightbox = document.querySelector(".lightbox");
const lightboxImage = lightbox.querySelector("img");
const closeBtn = lightbox.querySelector(".close");
const prevBtn = lightbox.querySelector(".prev");
const nextBtn = lightbox.querySelector(".next");

let currentIndex = 0;
const images = Array.from(gallery.querySelectorAll("img"));

// Open Lightbox
gallery.addEventListener("click", (e) => {
  if (e.target.tagName === "IMG") {
    currentIndex = parseInt(e.target.dataset.index, 10);
    updateLightbox();
    lightbox.style.display = "flex";
  }
});

// Close Lightbox
closeBtn.addEventListener("click", () => {
  lightbox.style.display = "none";
});

// Navigate to Previous Image
prevBtn.addEventListener("click", () => {
  currentIndex = (currentIndex - 1 + images.length) % images.length;
  updateLightbox();
});

// Navigate to Next Image
nextBtn.addEventListener("click", () => {
  currentIndex = (currentIndex + 1) % images.length;
  updateLightbox();
});

// Update Lightbox Image
function updateLightbox() {
  const imgSrc = images[currentIndex].src;
  lightboxImage.src = imgSrc;
  lightboxImage.alt = images[currentIndex].alt;
}

// Close Lightbox on Outside Click
lightbox.addEventListener("click", (e) => {
  if (e.target === lightbox) {
    lightbox.style.display = "none";
  }
});
Key Points:
data-indexis used to determine the current image in the gallery.- The lightbox updates dynamically based on the image clicked and allows users to navigate using the next and prev buttons.


This looks great, thanks for the code! I’m having an issue using it because line 23 of the html above has no link value in <img src="" …
I see javascript is using data-points to keep track of the current photo, but I don't understand how this img tag would know that. Could you please advise on if I'm missing something? Thanks!