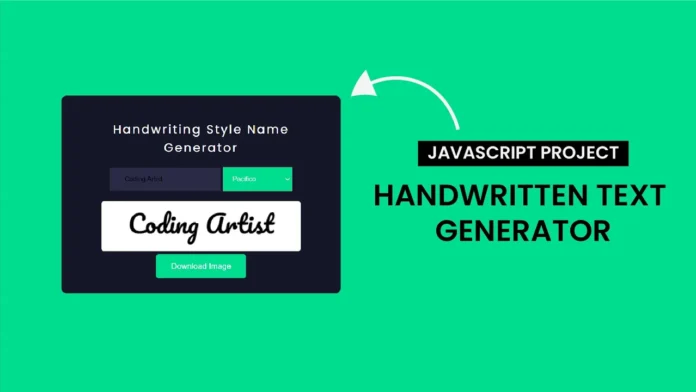
Do you love stylish fonts and personalized art? How about combining the two to create your own handwritten name image generator? In this tutorial, we’ll build a fun web app that lets you type in your name, pick a handwriting-style font, and download the output as an image — all using basic HTML, CSS, and JavaScript!
Let’s break down how it works from top to bottom.
Video Tutorial:
HTML: The Structure
HTML is the skeleton of your web app — it defines what elements appear on the screen.
Here’s what we’ve included:
<!DOCTYPE html>
<html lang="en">
  <head>
    <meta charset="UTF-8" />
    <meta name="viewport" content="width=device-width, initial-scale=1.0" />
    <title>Handwritten Text</title>
    <link
      href="https://fonts.googleapis.com/css2?family=Alex+Brush&family=Dancing+Script:wght@400..700&family=Pacifico&display=swap"
      rel="stylesheet"
    />
    <link rel="stylesheet" href="style.css" />
  </head>
  <body>
    <div class="container">
      <h2>Handwriting Style Name</h2>
      <input type="text" id="nameInput" placeholder="Enter your Name" />
      <select id="fontSelector">
        <option value="Alex Brush">Alex Brush</option>
        <option value="Dancing Script">Dancing Script</option>
        <option value="Pacifico">Pacifico</option>
      </select>
      <br />
      <canvas id="nameCanvas" width="400" height="100"></canvas>
      <br />
      <button onclick="downloadImage()">Download Image</button>
    </div>

    <script src="script.js"></script>
  </body>
</html>
Explanation:
-
Google Fonts link: Loads beautiful handwriting fonts like Alex Brush, Dancing Script, and Pacifico.
-
Input field: Lets the user type in their name.
-
Select dropdown: Allows users to choose from the loaded fonts.
-
Canvas: This is where the name is drawn using the selected font.
-
Button: On clicking, it triggers the download of the canvas as an image.
CSS: The Styling
CSS makes everything look nice. It defines colors, positioning, spacing, fonts, and layout styles. Here’s the full CSS:
body {
  background-color: #01dd8f;
  font-family: "Poppins", sans-serif;
  text-align: center;
}
.container {
  background-color: #151729;
  width: min(500px, 90vw);
  position: absolute;
  transform: translate(-50%, -50%);
  left: 50%;
  top: 50%;
  padding: 30px;
  border-radius: 10px;
}
h2 {
  color: #ffffff;
  font-weight: 400;
  letter-spacing: 3px;
}
button {
  background-color: #01dd8f;
  padding: 15px 30px;
  border: none;
  outline: none;
  border-radius: 5px;
}
canvas {
  background-color: #ffffff;
  border: none;
  margin-top: 20px;
  border-radius: 5px;
}
input {
  background-color: #2a2a46;
  border: none;
  outline: none;
  padding: 15px 30px;
  color: #ffffff;
}
input::placeholder {
  color: #ffffff;
}
select {
  outline: none;
  padding: 15px;
  background-color: #01dd8f;
  color: #ffffff;
}
Explanation:
-
Body: Sets a vibrant green background and a clean sans-serif font.
-
Container: Centers the content with padding and a dark background.
-
Typography: Headings and placeholders have subtle customizations for readability and style.
-
Canvas: Has a white background to clearly display the text.
-
Buttons/Inputs: Styled to match the overall neon/dark theme with rounded corners and easy-to-read colors.
JavaScript: The Functionality
JavaScript is where the magic happens. It handles everything interactive — drawing on canvas, updating fonts, and downloading the image.
function drawName() {
  let canvas = document.getElementById("nameCanvas");
  let ctx = canvas.getContext("2d");
  let name = document.getElementById("nameInput").value;
  let font = document.getElementById("fontSelector").value;
  document.fonts.ready.then(() => {
    ctx.clearRect(0, 0, canvas.width, canvas.height);
    ctx.font = `50px ${font}`;
    ctx.fillStyle = "black";
    ctx.textAlign = "center";
    ctx.fillText(name, canvas.width / 2, canvas.height / 2 + 15);
  });
}
document.getElementById("fontSelector").addEventListener("change", () => {
  document.fonts
    .load(`50px ${document.getElementById("fontSelector").value}`)
    .then(drawName);
});

document.getElementById("nameInput").addEventListener("input", () => {
  document.fonts
    .load(`50px ${document.getElementById("fontSelector").value}`)
    .then(drawName);
});
function downloadImage() {
  let canvas = document.getElementById("nameCanvas");
  let link = document.createElement("a");
  link.download = "handwritten-name.png";
  link.href = canvas.toDataURL("image/png");
  link.click();
}
-
drawName(): Gets the input text and selected font, and draws it on the canvas using
fillText(). -
document.fonts.ready: Ensures the font is fully loaded before drawing to avoid default fallbacks.
-
Event listeners: Watch for changes in the input field and dropdown menu, and automatically redraw the canvas in real time.
-
downloadImage(): Converts the canvas to a PNG image and triggers a download using an invisible anchor tag.
✅ Final Thoughts
This project is a great way to practice real-world web development skills:
-
✅ Handling user input
-
✅ Drawing with canvas
-
✅ Working with web fonts
-
✅ Dynamically updating the UI
-
✅ Exporting graphics as images
It’s a fun and creative app that you can share with friends or even use in your own portfolio.


