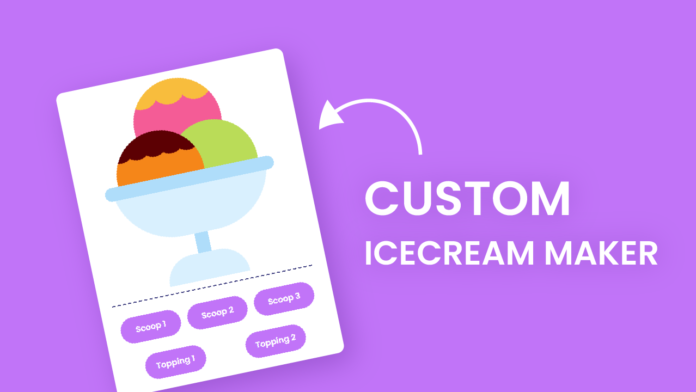
Have you ever dreamed of designing your own ice cream virtually? In this blog post, we’ll explore how to create an interactive “Custom Ice Cream Maker” using HTML, CSS, and JavaScript. This fun project lets users click buttons to change scoop colors and add toppings, visually simulating the creation of a custom dessert!
HTML:
The HTML provides the foundation of our ice cream maker. Inside the <body>, we have a .wrapper div containing two main sections: a .container that visually represents the ice cream bowl and scoops, and a .btns section that houses the interactive buttons. Each scoop is represented by a div (.scoop1, .scoop2, .scoop3) while the bowl and base are also defined using div elements. Buttons like “Scoop 1” and “Topping 2” let users interact with each scoop, triggering changes via JavaScript.
<!DOCTYPE html>
<html lang="en">
  <head>
    <meta charset="UTF-8" />
    <meta name="viewport" content="width=device-width, initial-scale=1.0" />
    <title>Custom Icecream Maker</title>
    <link
      href="https://fonts.googleapis.com/css2?family=Poppins&display=swap"
      rel="stylesheet"
    />
    <link rel="stylesheet" href="style.css" />
  </head>
  <body>
    <div class="wrapper">
      <div class="container">
        <div class="scoop1"></div>
        <div class="scoop2"></div>
        <div class="scoop3"></div>
        <div class="bowl">
          <div class="base"></div>
        </div>
      </div>
      <div class="btns">
        <button id="btn-scoop1">Scoop 1</button>
        <button id="btn-scoop2">Scoop 2</button>
        <button id="btn-scoop3">Scoop3</button>
        <button id="btn-topping1">Topping 1</button>
        <button id="btn-topping2">Topping 2</button>
      </div>
    </div>

    <script src="script.js"></script>
  </body>
</html>
CSS:
The CSS brings our ice cream to life. The body has a light purple background with the ice cream centered on the screen. Each scoop is styled as a circular div using border-radius: 50% and given unique colors. The .bowl is a semi-oval shape at the bottom, and .base adds a pedestal to complete the look. The buttons are styled with rounded edges, a vibrant purple background, and modern Poppins typography, enhancing the playful theme of the project.
body {
  background-color: #dcacfe;
  padding: 0;
  margin: 0;
  height: 100vh;
  display: flex;
  justify-content: center;
  align-items: center;
}
.wrapper {
  width: 300px;
  position: relative;
  background-color: #ffffff;
  padding: 30px 15px 15px 15px;
  border-radius: 10px;
}
.container {
  height: 300px;
  width: 100%;
  position: relative;
  bottom: 10px;
}
.bowl {
  width: 230px;
  height: 90px;
  background-color: #d9f0fe;
  position: absolute;
  margin: auto;
  left: 0;
  right: 0;
  bottom: 70px;
  border-radius: 0 0 150px 150px;
}
.bowl:before {
  content: "";
  position: absolute;
  height: 20px;
  width: 110%;
  background-color: #afddfa;
  left: -5%;
  border-radius: 20px;
}
.base {
  height: 40px;
  width: 20px;
  background-color: #afddfa;
  position: absolute;
  margin: auto;
  left: 0;
  right: 0;
  top: 90px;
}
.base:after {
  content: "";
  position: absolute;
  height: 40px;
  width: 120px;
  background-color: #d9f0fe;
  left: -50px;
  top: 30px;
  border-radius: 50px 50px 0 0;
}
.scoop1 {
  height: 130px;
  width: 130px;
  background-color: #f45c96;
  border-radius: 50%;
  position: absolute;
  background-size: 40px 150px;
  background-image: radial-gradient(
    circle at 20px 12px,
    #f8bd3d 25px,
    transparent 25px
  );
  margin: auto;
  left: 0;
  right: 0;
}
.scoop2 {
  height: 130px;
  width: 130px;
  background-color: #badc58;
  border-radius: 50%;
  position: absolute;
  top: 70px;
  right: 45px;
}
.scoop3 {
  height: 130px;
  width: 130px;
  background-color: #f58619;
  border-radius: 50%;
  top: 70px;
  left: 45px;
  position: absolute;
  background-size: 25px 80px;
  background-image: radial-gradient(
    circle at 12.5px 17px,
    #5c0003 20px,
    transparent 21px
  );
}
.btns {
  width: 100%;
  display: flex;
  align-items: center;
  justify-content: space-around;
  flex-wrap: wrap;
  border-top: 2px dashed #404080;
}
.btns button {
  font-family: "Poppins", sans-serif;
  padding: 10px 0;
  font-size: 12px;
  border-radius: 20px;
  width: 90px;
  border: none;
  outline: none;
  background-color: #c174f8;
  color: #ffffff;
  margin-top: 20px;
  cursor: pointer;
}
Javascript:
JavaScript is the brain behind the interactions. We first link each scoop and button to variables using document.querySelector and getElementById. Then, we define an array of colors that will be used to change scoop colors or toppings. Each time a user clicks a button, the color or topping on a scoop cycles through the array. For example, clicking “Topping 1” updates .scoop1‘s background-image with a radial gradient that simulates sprinkles.
const scoops = {
  scoop1: document.querySelector(".scoop1"),
  scoop2: document.querySelector(".scoop2"),
  scoop3: document.querySelector(".scoop3"),
};
const buttons = {
  scoop1: document.getElementById("btn-scoop1"),
  scoop2: document.getElementById("btn-scoop2"),
  scoop3: document.getElementById("btn-scoop3"),
  topping1: document.getElementById("btn-topping1"),
  topping2: document.getElementById("btn-topping2"),
};

const colors = [
  "#F45C96",
  "#F8BD3D",
  "#badc58",
  "#5C0003",
  "#F58619",
  "#EBAB70",
];

const counters = {
  scoop1: 0,
  scoop2: 0,
  scoop3: 0,
  topping1: 0,
  topping2: 0,
};

const genNextColorIndex = (current) =>
  current < colors.length - 1 ? current + 1 : 0;

buttons.scoop1.addEventListener("click", () => {
  scoops.scoop1.style.backgroundColor = colors[counters.scoop1];
  counters.scoop1 = genNextColorIndex(counters.scoop1);
});
buttons.scoop2.addEventListener("click", () => {
  scoops.scoop2.style.backgroundColor = colors[counters.scoop2];
  counters.scoop2 = genNextColorIndex(counters.scoop2);
});
buttons.scoop3.addEventListener("click", () => {
  scoops.scoop3.style.backgroundColor = colors[counters.scoop3];
  counters.scoop3 = genNextColorIndex(counters.scoop3);
});
buttons.topping1.addEventListener("click", () => {
  scoops.scoop1.style.backgroundImage = `radial-gradient(circle at 20px 18px, ${
    colors[counters.topping1]
  } 25px,transparent 25px)`;
  counters.topping1 = genNextColorIndex(counters.topping1);
});
buttons.topping2.addEventListener("click", () => {
  scoops.scoop3.style.backgroundImage = `radial-gradient(circle at 12.5px 17px, ${
    colors[counters.topping2]
  } 20px,transparent 21px)`;
  counters.topping2 = genNextColorIndex(counters.topping2);
});


