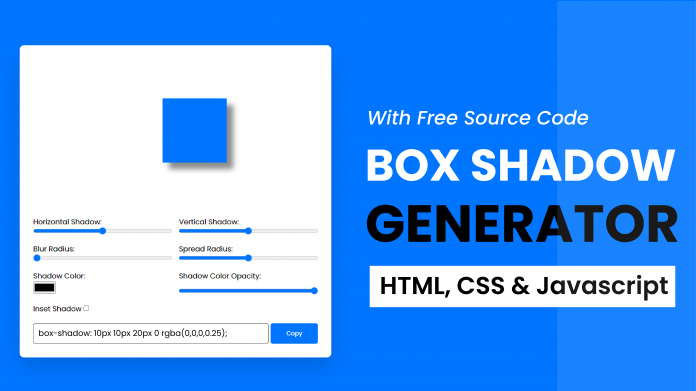
Video Tutorial:
If you prefer to learn by coding along to a video tutorial you should check out the video down below. Also subscribe to my youtube channel to stay updated with the latest tutorials, tips and tricks. I also post multiple-choice questions daily to help you learn HTML, CSS and Javascript.
Project Folder Structure:
We begin by creating the project folder structure. We create a project folder named – ‘Box Shadow Generator’. Inside this folder, we have three files – index.html, style.css and script.js. These are the HTML document, the stylesheet and the javascript file.
HTML:
We start with HTML code. Firstly copy the code below and paste it into your HTML document.
In the HTML code, we have a bunch of range sliders with unique ids assigned to each of them. Also, they come with min, max and a default value.
<!DOCTYPE html>
<html lang="en">
  <head>
    <meta name="viewport" content="width=device-width, initial-scale=1.0" />
    <title>Box Shadow Generator</title>
    <!-- Google Font -->
    <link
      href="https://fonts.googleapis.com/css2?family=Poppins&display=swap"
      rel="stylesheet"
    />
    <!-- Stylesheet -->
    <link rel="stylesheet" href="style.css" />
  </head>
  <body>
    <div class="container">
      <div class="result">
        <div id="element"></div>
      </div>
      <div class="sliders">
        <div class="slider-wrapper">
          <label for="h-shadow">Horizontal Shadow:</label>
          <input type="range" id="h-shadow" max="100" min="-100" value="0" />
        </div>
        <div class="slider-wrapper">
          <label for="v-shadow">Vertical Shadow:</label>
          <input type="range" id="v-shadow" max="100" min="-100" value="0" />
        </div>
        <div class="slider-wrapper">
          <label for="blur-radius">Blur Radius:</label>
          <input type="range" id="blur-radius" max="100" min="0" value="0" />
        </div>
        <div class="slider-wrapper">
          <label for="spread-radius">Spread Radius:</label>
          <input type="range" id="spread-radius" max="50" min="-50" value="0" />
        </div>
        <div class="slider-wrapper">
          <label for="shadow-color">Shadow Color:</label>
          <input type="color" id="shadow-color" />
        </div>
        <div class="slider-wrapper">
          <label for="shadow-color-opacity">Shadow Color Opacity:</label>
          <input
            type="range"
            id="shadow-color-opacity"
            max="1"
            min="0"
            step="0.1"
            value="1"
          />
        </div>
        <div class="input-wrapper">
          <label for="shadow-inset">Inset Shadow:</label>
          <input type="checkbox" id="shadow-inset" />
        </div>
      </div>
      <div class="code-wrapper">
        <textarea rows="2" id="code"></textarea>
        <button onclick="copyCode()">Copy</button>
      </div>
    </div>
    <!-- Script -->
    <script src="script.js"></script>
  </body>
</html>
Other Tutorial You Might Like:
- Product Filter and Search Using Javascript
- Emoticon Toggle With Checkbox
- F.A.Q Accordion Using HTML, CSS and Javascript
CSS:
We now style this generator using CSS. Now copy the code below and paste it into your stylesheet.
* {
  padding: 0;
  margin: 0;
  box-sizing: border-box;
  font-family: "Poppins", sans-serif;
}
body {
  background-color: #0075ff;
}
.container {
  background-color: #ffffff;
  padding: 30px;
  position: absolute;
  transform: translate(-50%, -50%);
  left: 50%;
  top: 50%;
  width: 80vmin;
  border-radius: 10px;
  box-shadow: 0 20px 40px rgba(2, 42, 83, 0.2);
}
.result {
  padding: 150px 0;
}
#element {
  height: 50px;
  width: 50px;
  position: relative;
  background-color: #0075ff;
  margin: auto;
}
.sliders {
  display: grid;
  grid-template-columns: 6fr 6fr;
  gap: 20px 15px;
}
.slider-wrapper {
  display: flex;
  flex-direction: column;
  justify-content: space-between;
}
input[type="range"] {
  width: 100%;
}
.code-wrapper {
  display: grid;
  grid-template-columns: 10fr 2fr;
  gap: 5px;
  margin-top: 20px;
}
textarea {
  resize: none;
  padding: 5px;
  border: 1px solid black;
  border-radius: 5px;
}
.code-wrapper button {
  background-color: #0075ff;
  border-radius: 5px;
  border: none;
  color: #ffffff;
}
Javascript:
We finally need to add functionality to this generator. To implement the logic we use Javascript. Once again copy the code below and paste it into your javascript file.
let elem = document.getElementById("element");
let code = document.getElementById("code");
let inputs = document.querySelectorAll(".sliders input");

inputs.forEach((inp) => inp.addEventListener("input", generateShadow));

function generateShadow() {
  let hShadow = document.getElementById("h-shadow").value;
  let vShadow = document.getElementById("v-shadow").value;
  let blurRadius = document.getElementById("blur-radius").value;
  let spreadRadius = document.getElementById("spread-radius").value;
  let shadowColor = document.getElementById("shadow-color").value;
  let shadowColorOpacity = document.getElementById(
    "shadow-color-opacity"
  ).value;
  let shadowInset = document.getElementById("shadow-inset").checked;

  //Using ternary operator to check if inset checkbox is checked or not.
  //If checked we add the inset prefix
  //Else no inset prefix is added
  let boxShadow = shadowInset
    ? `inset ${hShadow}px ${vShadow}px ${blurRadius}px ${spreadRadius}px ${hexToRgba(
        shadowColor,
        shadowColorOpacity
      )}`
    : `${hShadow}px ${vShadow}px ${blurRadius}px ${spreadRadius}px ${hexToRgba(
        shadowColor,
        shadowColorOpacity
      )}`;
  elem.style.boxShadow = boxShadow;
  code.textContent = `box-shadow: ${boxShadow};`;
}

//Converting Hex value to rgba
function hexToRgba(shadowColor, shadowColorOpacity) {
  let r = parseInt(shadowColor.substr(1, 2), 16);
  let g = parseInt(shadowColor.substr(3, 2), 16);
  let b = parseInt(shadowColor.substr(5, 2), 16);
  return `rgba(${r},${g},${b},${shadowColorOpacity})`;
}

//Copy the generated code to clipboard
function copyCode() {
  code.select();
  document.execCommand("copy");
  alert("Code Copied To Clipboard");
}

//Call the generateShadow function on every page load
window.onload = generateShadow();
Our box-shadow generator project is now ready. If you have any issues while creating this code you can download the source code by clicking on the download button below. Also, I would love to hear from you guys. So if you have any queries, suggestions or feedback please comment on them below.
Happy Coding.


