Introduction:
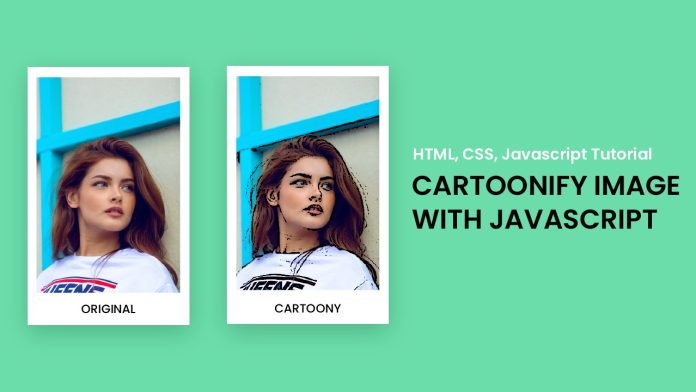
Welcome to this exciting tutorial where we will learn how to create a cartoon filter for images using OpenCV and JavaScript. By the end of this tutorial, you’ll be able to build your own cartoon filter and apply it to any image you like. We’ll dive into the code, explaining each step and providing a video tutorial on my YouTube channel for visual learners.
Things You Will Learn:
- Setting up the project folder structure.
- Creating the HTML file for image input and output.
- Styling the HTML using CSS for a visually appealing interface.
- Implementing the cartoon filter using OpenCV and JavaScript.
- Displaying the filtered image and enabling users to download it.
Video Tutorial:
Before we delve into the code, you can watch the video tutorial on my YouTube channel, where I walk you through the entire process step by step. The video link is:
Project Folder Structure:
To begin, create a new project folder with the following structure:
– style.css
– script.js
– opencv.js
HTML:
Let’s start by setting up the HTML structure:
<!DOCTYPE html>
<html lang="en">
  <head>
    <meta name="viewport" content="width=device-width, initial-scale=1.0" />
    <title>Cartoonify Image</title>
    <link rel="stylesheet" href="style.css" />
  </head>
  <body>
    <div class="container">
      <input type="file" id="file" accept="image/*" />
      <label for="file"> Choose A Photo </label>
    </div>
    <div id="post-upload-container" class="hide">
      <div class="image-container">
        <img id="image" crossorigin="anonymous" />
        <canvas id="output-canvas"></canvas>
      </div>
      <div class="btns">
        <button id="preview">Preview</button>
        <a href="" id="download" class="hide">Download</a>
      </div>
    </div>

    <script src="./script.js"></script>
    <script src="open-cv.js" onload="openCvReady()"></script>
  </body>
</html>
CSS:
Next, let’s add some CSS to make the interface visually appealing:
* {
  padding: 0;
  margin: 0;
  box-sizing: border-box;
  font-family: "Poppins", sans-serif;
}
body {
  background-color: #6bddab;
}
.container {
  background-color: #ffffff;
  width: min(90%, 28em);
  position: absolute;
  transform: translate(-50%, -50%);
  left: 50%;
  top: 50%;
  padding: 3.12em 1.87em;
  border-radius: 0.5em;
  box-shadow: 0 1.25em 2.18em rgba(2, 44, 26, 0.2);
}
input[type="file"] {
  display: none;
}
label {
  display: block;
  position: relative;
  background-color: #2cd28a;
  text-align: center;
  color: #ffffff;
  font-size: 1.12em;
  width: 16em;
  margin: auto;
  cursor: pointer;
  border-radius: 0.3em;
  padding: 1em 0;
}
#post-upload-container {
  width: min(50em, 90%);
  position: absolute;
  transform: translate(-50%, -50%);
  left: 50%;
  top: 50%;
  background-color: #ffffff;
  padding: 3em 2em;
  border-radius: 0.8em;
  box-shadow: 0 2em 4em rgba(2, 44, 25, 0.2);
}
.image-container {
  width: 100%;
  display: grid;
  grid-template-columns: 1fr 1fr;
  gap: 1em;
}
img,
canvas {
  width: 100%;
}
.btns {
  width: 100%;
  display: flex;
  justify-content: center;
  gap: 1em;
  margin-top: 2em;
}
.btns button,
.btns a {
  padding: 1em 2em;
  border: 3px solid #2cd28a;
  font-size: 1em;
  border-radius: 0.5em;
}
.btns button {
  background-color: #ffffff;
  color: #2cd28a;
}
.btns a {
  text-decoration: none;
  background-color: #2cd28a;
  color: #ffffff;
}
.hide {
  display: none;
}
JS:
Finally, let’s implement the cartoon filter using OpenCV and JavaScript:
You can get the Open CV code from here
const imgElement = document.getElementById("image");
const fileInput = document.getElementById("file");
const downloadButton = document.getElementById("download");
const previewButton = document.getElementById("preview");
const container = document.querySelector(".container");
const outputCanvas = document.getElementById("output-canvas");
const postUploadContainer = document.getElementById("post-upload-container");

let cvReady = false,
  fileName = "";
function openCvReady() {
  cv["onRuntimeInitialized"] = () => {
    cvReady = true;
  };
}
fileInput.onchange = () => {
  let reader = new FileReader();
  reader.readAsDataURL(fileInput.files[0]);
  reader.onload = () => {
    imgElement.setAttribute("src", reader.result);
    container.classList.add("hide");
    postUploadContainer.classList.remove("hide");
  };
  fileName = fileInput.files[0].name.split(".")[0];
};

const imageApply = () => {
  const mat = cv.imread(imgElement);
  const newImage = new cv.Mat();
  cv.cvtColor(mat, newImage, cv.COLOR_BGR2GRAY, 0);
  const edges = new cv.Mat();
  cv.adaptiveThreshold(
    newImage,
    edges,
    255,
    cv.ADAPTIVE_THRESH_MEAN_C,
    cv.THRESH_BINARY,
    9,
    9
  );
  const color = new cv.Mat();
  cv.bilateralFilter(newImage, color, 9, 250, 250, cv.BORDER_DEFAULT);
  cv.cvtColor(mat, color, cv.COLOR_RGBA2RGB, 0);

  const cartoon = new cv.Mat();
  cv.bitwise_and(color, color, cartoon, edges);
  cv.imshow("output-canvas", cartoon);
  mat.delete();
  newImage.delete();
  edges.delete();
  cartoon.delete();
};

previewButton.addEventListener("click", () => {
  if (cvReady) {
    imageApply();
    downloadButton.classList.remove("hide");
    let imagedata = outputCanvas.toDataURL("image/png");
    downloadButton.href = imagedata;
    downloadButton.download = `${fileName}.png`;
  } else {
    alert("Something went wrong.Please try again!");
  }
});
Conclusion:
Congratulations! You have successfully created a cartoon filter for images using OpenCV and JavaScript. By following this tutorial, you have learned how to apply image processing techniques to create artistic effects on images. You can now use this knowledge to explore other image-processing filters and effects, and even integrate them into your own projects.


