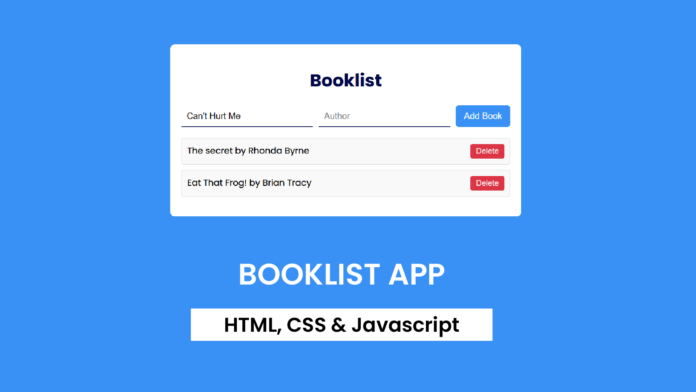
Managing a list of books has never been easier! In this tutorial, we’ll create a Booklist App using HTML, CSS, and JavaScript. The app allows users to add books along with their authors to a list and delete them as needed. This project is perfect for beginners looking to practice DOM manipulation and event handling in JavaScript.
Let’s dive in! 🚀
Demo
Before we start, here’s what the app will look like:
- Users can add a book title and its author.
- The book is displayed in a neatly styled list.
- A delete button allows users to remove any book from the list.
-
HTML Structure
The app’s layout consists of:
- A title section.
- An input form with fields for the book title and author.
- A button to add books.
- A list to display the books.
Here’s the HTML code:
<!DOCTYPE html>
<html lang="en">
  <head>
    <meta name="viewport" content="width=device-width, initial-scale=1.0" />
    <title>Booklist App</title>
    <link rel="stylesheet" href="style.css" />
  </head>
  <body>
    <div class="container">
      <h1>Booklist</h1>
      <div class="form-container">
        <input type="text" id="book-title" placeholder="Book Title" />
        <input type="text" id="book-author" placeholder="Author" />
        <button id="add-book">Add Book</button>
      </div>
      <ul id="book-list"></ul>
    </div>
    <script src="script.js"></script>
  </body>
</html>
Styling the App with CSS
We’ve used CSS to give the app a clean and modern design:
- Background color: A calm blue gradient.
- Form inputs: Minimal and focus-friendly.
- Buttons: Hover effects for better interactivity.
- Book list: Styled as a neat card layout with delete buttons.
Here’s the CSS code:
body {
  font-family: "Poppins", sans-serif;
  background-color: #3991f5;
  margin: 0;
  padding: 0;
  display: flex;
  justify-content: center;
  align-items: center;
  height: 100vh;
}
.container {
  width: 100%;
  max-width: 600px;
  background-color: #ffffff;
  padding: 20px;
  border-radius: 8px;
}
h1 {
  text-align: center;
  color: #010849;
}
.form-container {
  display: flex;
  gap: 10px;
  margin-bottom: 20px;
}
#book-title,
#book-author {
  flex: 1;
  padding: 10px;
  font-size: 1rem;
  border: none;
  outline: none;
  border-bottom: 1px solid #010849;
}
#add-book {
  padding: 10px 15px;
  font-size: 1rem;
  background-color: #3991f5;
  outline: none;
  border: none;
  border-radius: 5px;
  color: #ffffff;
  cursor: pointer;
}
#add-book:hover {
  background-color: #063e83;
}
#book-list {
  list-style: none;
  padding: 0;
}
#book-list li {
  display: flex;
  justify-content: space-between;
  padding: 10px;
  background: #f9f9f9;
  border: 1px solid #dddddd;
  border-radius: 4px;
  margin-bottom: 10px;
}
#book-list li .details {
  flex: 1;
}
#book-list li button {
  padding: 5px 10px;
  font-size: 0.9em;
  color: white;
  background-color: #dc3545;
  border: none;
  border-radius: 4px;
  cursor: pointer;
}
#book-list li button:hover {
  background-color: #c82333;
}
Adding Functionality with JavaScript
The JavaScript code adds interactivity to the app:
- Adding a book:
- Users enter a title and author in the input fields.
- The app validates that both fields are filled in.
- The book is added to the list dynamically.
- Deleting a book:
- Each book comes with a delete button.
- Clicking the button removes the book from the list.
Here’s the JavaScript code:
const bookTitleInput = document.getElementById("book-title");
const bookAuthorInput = document.getElementById("book-author");
const addBookBtn = document.getElementById("add-book");
const bookList = document.getElementById("book-list");

addBookBtn.addEventListener("click", () => {
  const title = bookTitleInput.value.trim();
  const author = bookAuthorInput.value.trim();
  if (title === "" || author === "") {
    alert("Please enter both title and author");
  }
  addBook(title, author);
  bookTitleInput.value = "";
  bookAuthorInput.value = "";
});

function addBook(title, author) {
  const li = document.createElement("li");

  const details = document.createElement("span");
  details.className = "details";
  details.textContent = `${title} by ${author}`;

  const deleteBtn = document.createElement("button");
  deleteBtn.textContent = "Delete";
  deleteBtn.addEventListener("click", () => {
    li.remove();
  });
  li.appendChild(details);
  li.appendChild(deleteBtn);

  bookList.appendChild(li);
}
- Dynamic list management: Add and delete books without refreshing the page.
- Validation: Ensures that both fields are filled before adding a book.
- Simple and interactive design: A user-friendly layout with smooth hover and click effects.
This Booklist App is a fun and practical project for JavaScript beginners. With just a few lines of code, you can create an interactive app that can be expanded further—for example, by adding search functionality or saving the list in local storage.
Let me know if you try it out or have any questions. Happy coding! 😊


