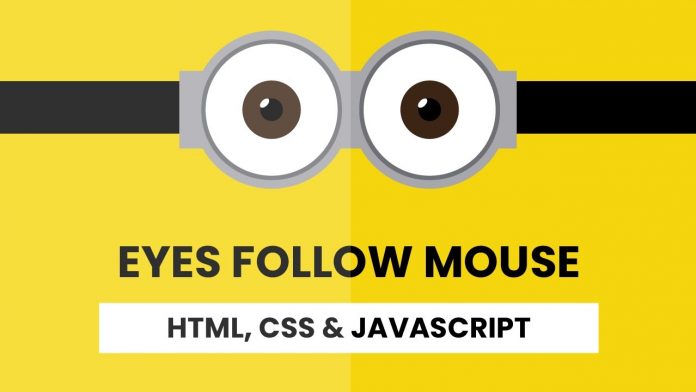
Hello and welcome to today’s tutorial. Today’s tutorial will be a fun tutorial. In today’s tutorial, we will learn how to create minion eyes that follow your mouse cursor.
To create this project we need HTML, CSS and Javascript. This project is well suited for javascript intermediates. Javascript beginners might feel this project is a bit tricky.
In this project, we create minion eye art using HTML and CSS. And to make the eyes follow the mouse, we make use of javascript. If you are interested in creating more such CSS art, you can check out this playlist here.
Video Tutorial:
I have a video version of this tutorial on my youtube channel. If you would prefer to code along with me, then do check out the video below. Also, I post a new tutorial on my youtube channel every alternate day. So do subscribe to my channel so that you don’t miss these exciting tutorials.
Project Folder Structurre:
Now before we move on to the actual coding, let first check out the project folder structure. The project folder is called – Minion Eyes Follow Mouse. Within this folder, we have three files. These three files are named – index.html, style.css and script.js.They are HTML document, stylesheet and script file respectively.
HTML:
We start with the HTML code. Now copy the code below and paste it into your HTML document.
<!DOCTYPE html>
<html lang="en">
  <head>
    <meta name="viewport" content="width=device-width, initial-scale=1.0" />
    <title>Minion Eyes Follow Mouse</title>
    <!-- Stylesheet -->
    <link rel="stylesheet" href="style.css" />
  </head>
  <body>
    <div class="container">
      <div class="eyes-wrapper">
        <div class="eye">
          <div class="eyeball"></div>
        </div>
        <div class="eye">
          <div class="eyeball"></div>
        </div>
      </div>
    </div>
    <!-- Script -->
    <script src="script.js"></script>
  </body>
</html>
CSS:
Next, we add styles to this HTML element to make them look like minion eyes with the help of CSS. Do copy the code provided below and paste it into your stylesheet.
body {
  padding: 0;
  margin: 0;
  background-color: #f5d60e;
}
.container {
  width: 100vw;
  height: 100vh;
  display: flex;
  align-items: center;
  justify-content: center;
}
.container:before {
  content: "";
  position: absolute;
  width: 100%;
  height: 4em;
  background-color: #231f1e;
  transform: translate(-50%, -50%);
  top: 50%;
  left: 50%;
  z-index: -1;
}
.eyes-wrapper {
  display: flex;
}
.eyes-wrapper:before {
  content: "";
  position: absolute;
  width: 26em;
  height: 6em;
  background-color: #a8a7ac;
  margin: auto;
  left: 0;
  right: 0;
  top: 0;
  bottom: 0;
  z-index: -1;
}
.eye {
  width: 10em;
  height: 10em;
  border: 15px solid #a6a4ad;
  background-color: #ffffff;
  border-radius: 50%;
}
.eyeball {
  height: 3.2em;
  width: 3.2em;
  background: radial-gradient(#271e1e 35%, #935a29 37%);
  border-radius: 50%;
  margin: 0.2em 3.5em;
  position: relative;
}
.eyeball:before {
  content: "";
  position: absolute;
  background-color: #ffffff;
  height: 0.7em;
  width: 0.5em;
  border-radius: 50%;
  top: 13px;
  left: 13px;
  transform: rotate(45deg);
}
Javascript:
To add functionality to these eyes, we use javascript. Now again, copy the javascript code that is provided below and paste it into your script file.
//Selecting the eye div
let eye_ref = document.querySelectorAll(".eye");

//mousemove for devices with mouse aand touchmove for touchcreen devices
let events = ["mousemove", "touchmove"];

//Check for touch screen
function isTouchDevice() {
  try {
    document.createEvent("TouchEvent");
    return true;
  } catch (e) {
    return false;
  }
}

//Same function for both events
events.forEach((eventType) => {
  document.body.addEventListener(eventType, (event) => {
    eye_ref.forEach((eye) => {
      /* getBoundingClientRect() method returns the position relative to the viewport */
      let eyeX = eye.getBoundingClientRect().left + eye.clientWidth / 2;
      let eyeY = eye.getBoundingClientRect().top + eye.clientHeight / 2;

      /* ClientX and ClientY return the position of clients cursor from top left of the screen*/
      var x = !isTouchDevice() ? event.clientX : event.touches[0].clientX;
      var y = !isTouchDevice() ? event.clientY : event.touches[0].clientY;

      /*
    Subtract x position of mouse from x position of eye and y position of mouse from y position of eye.
    Use atan2(returns angle in radians)
    */

      let radian = Math.atan2(x - eyeX, y - eyeY);
      //Convert Radians to Degrees
      let rotationDegrees = radian * (180 / Math.PI) * -1 + 180;
      //Rotate the eye
      eye.style.transform = "rotate(" + rotationDegrees + "deg)";
    });
  });
});
If you have any issues while creating this code, you can download the source code by clicking on the download code button below. Also, if you have any suggestions or feedback, do drop them in the comments below.


This was really helpfull! Thank you for the code!